Castle Grayskull Weapons Room
Starting a new commission piece, this will be a weapons room within Castle Grayskull, scaled to Mattels 80’s He-man and the Masters of the Universe range.
This piece will be similar to one I built for myself but longer to accommodate more figures and even Battle Cat as demonstrated.
Building the scene
This piece is made from foam insulation board, the base, walls and the steps I have used 10 mm foam board.


After speaking with my client, 20″was too long to for into his deltof. I’ve taken 6″ off the base and back wall.


The aim is to try and make this as close to the Filmation version of the 80’s, one of the things I have found difficult is trying to replicate the floor. After going on a MOTU DVD binge I settled on a floor pattern I saw of the turret floor with the Talon Fighter parked on it.

Stone slabs scored, time to start on the walls.

Brick work and windows cut and scored into the foam.


Drawing upon inspiration from the 80’s MOTU cartoon for the walls, cutting a piece of 6mm foam to create alcoves for the long wall. With alcoves cut and sanded, the sheet is then glued using PVA glue on too of the first sheet. Once this is dry, I will start adding the detail.


![]()


I have framed the window to add some detail to this wall. Sanding down two strips of 10 mm boars, rounding them off to look like pillars reaching up the roof. Adding another strip for the length of the other wall like a pelmet and then adding the usual cracks to the stone wall.


A couple of little details to add before painting and then casting vintage MOTU weapons which will be hung on the walls.
Casting decorations
Putting the foam board aside for a minute, my focus of today was casting some decorations before I started painting the interior.
Using Blustuff to make half molds of a handful of vintage MOTU weapons and a head of 200x Slime Pit skeleton monster (see last picture). I have created the wall decorations, the heads will be painted the same colour as the walls but weapons will be painted separately.


I’ve casted another small axe and a mace, when the painting is complete will be fixed to walls along with the rest of the weapons.


I finished this build off by making an exterior wall, scoring brick work and adding detail to around the window.


Painting
First base coat has been applied. I have used chalkboard black spray paint which I have found is excellent for base coating plastic and resin, also it doesn’t eat foam board as other spray paint can.


A base coat was applied to the exterior and a second coat to the interior.


The weapons and shield where painted with Games Workshops Leadbelcher, shaded with Games Workshops Nuln Oil and then dry brushed with Games Workshops Stormhost Silver.


I was tasked to paint this using the same colour scheme as Filmation used in the 80’s cartoon. The interior being a a turquoise blue.

First layer of grey added using a roller with a sponge head.


Adding green and blue to grey mix from this morning, the next layer will be blue to match alongside the 80’s cartoon.


To get this closer to the Filmation version of Grayskull I’ve gone over the interior walls using a dark green mixed with the grey.


With the paint dry, this is what it looks like so far.


Finally worked out the colour scheme to match the Filmation cartoon. After airbrushing a layer of turquoise, when it had dried a layer of blue and then another lighter blue. I edged it using Games Workshop’s Calgar blue and then dry brushed with Games Workshops Baharroth Blue.


The external wall a dark green coat was airbrushed on. When dry olive green was airbrushed into the centre of each brick. Each brick was edged with GW Caliban Green, which was worked into the brick to blend with olive green. I finished by dry brushing GW Ogryn Camo over all the brickwork.


The wood using Games Workshop’s Rhino Hide and then edged with Gorthor Brown.


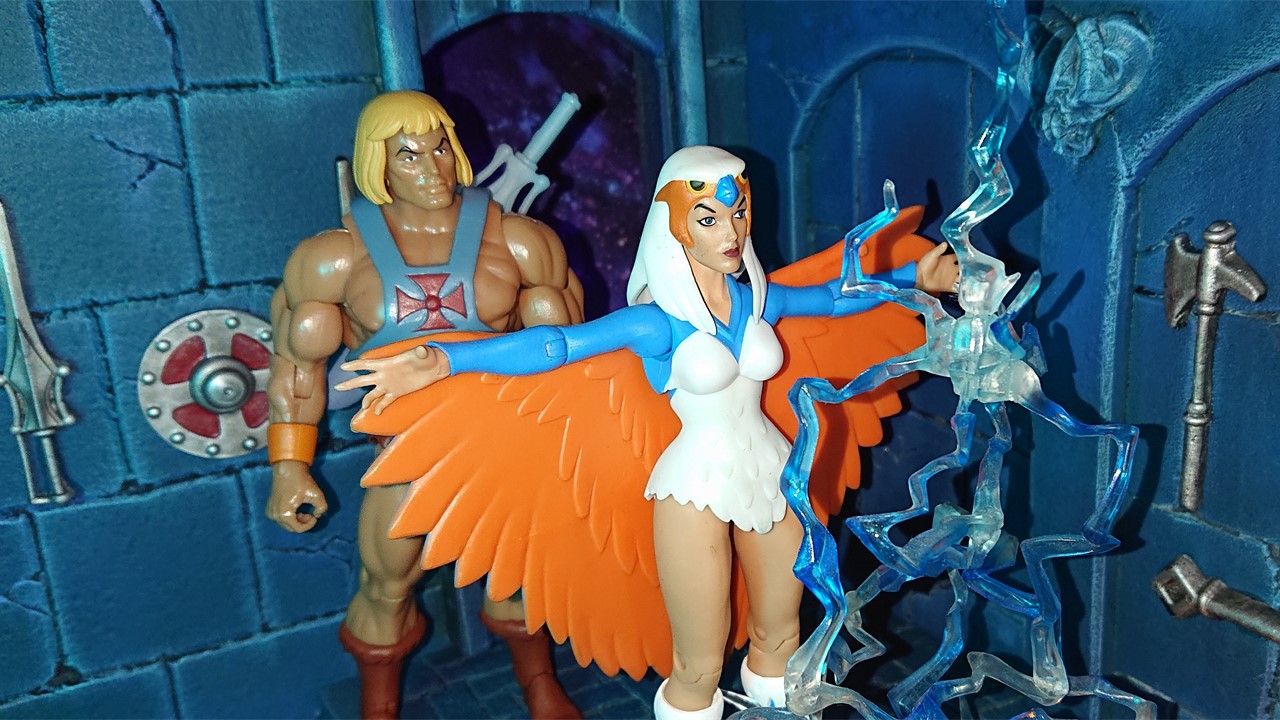
Final Pictures


