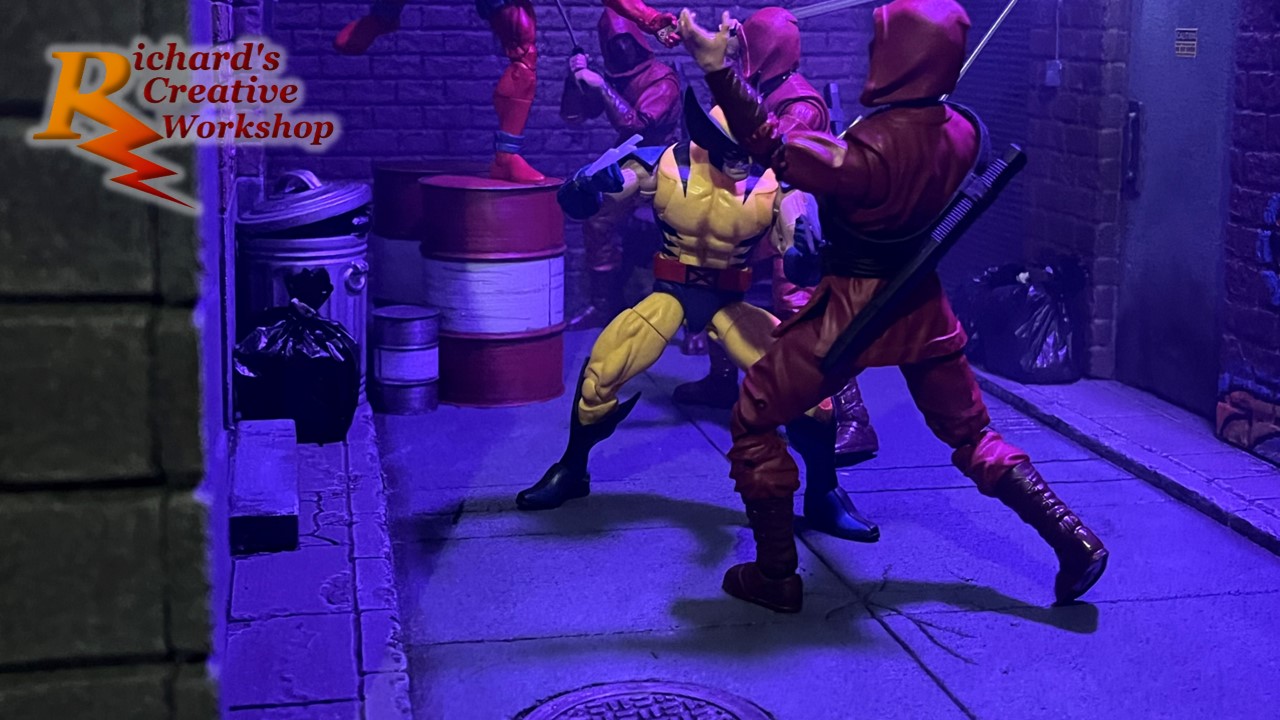
Alleyway
I am starting this New Year with a new diorama display, which is compatible with both 6 & 7″ action figures.
Building the Diorama
This piece is going to be a 3-sided alley. To start, I have cut one wall at 10” high, and at the moment it’s 23” long. As you can see, I’ve cut a door with a single step, added the brickwork. My next step is to add another layer of foam to the wall and then start on the opposite wall. I am toying with the idea of adding another 10” in height, but I’ll see how I feel once the other walls are done.


The specific relevant content for this request, if necessary, delimited with characters: I’ve started working on the opposite wall of my latest diorama, this wall is 23” x 10” the wall is the same size as the other one. This wall I’ve cut a dock door, a door and two windows. I’ve scored in the brickwork and then rolled a ball of of tin foil over the bricks. I cut another piece of foam and used that as a backboard for the first wall.


My next steps is to start work on the rear wall before working on the floor.
I have made two fronts for the buildings, scoring the foam the same way I made the two walls and then finished off by adding corner stones to each building.


My next step is add another layer of foam to top of each building which will give me the option to add another story to each building. Then I’m going to work on the base, which will then help me work out how wide the back will be.
I’ve added a layer of foam to the top of both buildings, this gives me the option to add another story onto each of them.


I’ve started work on the base, I cut 2 pieces of 6 mm foamboard, each piece will be be used as pavements for each building. Both pieces once scored will be glued onto another piece of foamboard which will act as the road. I cut the last piece of foam which I’ll score bricks onto, this will attached to the back of each building with magnetic tape. This will give me the option to change the back wall to either the front of another building or a broken wall etc.


My next steps is to score all the pieces that I’ve cut.
I’ve been working on the pavements and the wall at the rear of this pieces. I scored the curb, flag stones, brickwork and cracks in the stone.


My next step is to add another layer of foam behind the wall and on top. Then work on the road.
I’ve scored the road in between the two buildings, added a layer of foam on top of the back wall.


Once this was done I started to build a second story to both buildings, each to same dimensions to ground floor. Once the foam was cut, I cut out 4 windows in each, added the brickwork, glued it together, including adding right angle pieces to keep it all square and then finished for the day by cutting foam pieces for the roof.


I found a city scene picture that I’ve have used over the years which fits perfectly behind the wall to finish the effect once I have completed all work on this piece.


My next steps are to add cornerstones onto the new stories, fix the roofs on and then I can start painting this and start work on on the accessories.
Painting the Diorama
After adding some final bits to the windows I’ve now applied a black undercoat of paint. It’s now time to paint this set. While the paint the was drying, I have started to print some of the accessories which will be added after I’ve finished painting, the first is a manhole cover.


First coat painted for the brick, while this is drying I am printing off window frames. One down and 7 more to go!


Almost finished painting the first coats onto the buildings and road, while printing off 6 more window frames.


When the paint is dry I will be adding the washes over all surfaces.
Apologies for the lack of figures in these pictures but paint is still wet
I’ve made a lot of painting progress over the past couple of days. I added a brown wash over the bricks and pavement, and a black wash over the cornerstones. While that was drying, I cut a hole into the foam and glued the rim of the manhole cover.


I’ve dry brushed a light brown over the bricks, a light grey over the pavement, cornerstones and the on top of the wall. I sponged a light grey over the road and one of the doors.


I then turned my attention to some of the accessories that I’ve printed off. The window frames have been painted a dark grey, the small oil barrel, drain, manhole cover and rim with metallic grey. The AC units I’ve started to paint white but I’m waiting for another 2 to finish printing. I’ve primed two drainpipes.


It’s getting there!
Here’s what it looks like so far.
I’ve painted the doors buts need to dirty them up and add door handles. Added corrugated cardboard for garage door. Painted the pipes, ac units and windows. Need to add wires and fuse boxes. I have some more accessories to make and paint and I’ve bought a couple of mini desk lights which I’m going to break down and use as lights above each of the two doors.


The dead spaces and what to do with them? The original idea was to add tissue paper over the all the windows and leave it but not sure now since I have JJ Jameson hanging out of one.


I’ve been working on the accessories, first I’ve added 2 LED lights, one above each of the doors. I’ve added a double fuse box with wires running to the AC unit, up the wall and disappear behind the building. On the other building a single fuse box with a wire running up the wall and again disappears behind the building. A switch and cable running up towards the garage door


I’ve started painting another oil drum, then cut a couple of pieces of foam and turn them into wooden panels to cover up two bottom widows on the right building.


A few more little bits to do on the exterior and then I’ll work on the building interiors.
Building the Accessories
With the exteriors finished, I’ve been busy printing and making accessories. I’ve made pallets (which need painting) and trash bags and another oil barrel but thinking of making another couple. For the past couple of days I’ve been printing a street light but the base is a little bigger than I had hoped. I’m just printing off the glass dome for the top and then I can add a led in it.


Once all of these are painted, it’s time to work on the interiors.


I’ve printed a newspaper box, sorted out the LED for lamp post, I’ve just got a couple of little things to add and then I can start working on the interiors of the top two floors.


I’ve been working on one of the interiors of my alleyway diorama. I’ve gone with an abandoned interior, tattered walls, floorboards, cracked walls, when I’ve finished painting the interior I will add a broken ceiling. I’ve started to paint the bricks and floorboards and then added a dark brown wash over them. The next steps is to paint the walls.


I have printed a chair and painted it to give it a worn look, then painted some of the accessories for the work table.


I’ve almost finished the first interior with applying a brown wash over the walls and then dry brushing over the wash after it’s dried.


I’ve then set to the second interior and this time I’ve gone for an office look. I’ve made the room smaller, added a floor, the start of a border and marked out tiles on the floor.


The base I’ve added a piece of 30 mm foam board and cut a hole for manhole and glued it onto my original base.


My next steps is to finish the ceiling for the first room and then to finish framing the second room before starting to paint it.


My client returned the alleyway diorama for me to finish it. The dilapidated interior I created a brick back wall and a broken boarded roof, the brick wall is attached with magnetic tape. The second interior I’ve made it to look like an office room, clean walls tiled floor and ceiling. I’ve added an LED strip to the ceiling to add lighting. The back wall matches the interior, I’ve added to windows to the wall with tissue paper to cover the windows.


Final Pictures


