Coruscant Underworld
After making a few 6″ based module dioramas, I wanted to go back to figures that started my diorama journey. What started off as a simple set of modular diorama’s, soon escalated into something a little bit more!
Store 1
Building the Scene
This modular display are for 3.75″ Star Wars figures, made from foam board of 6 & 10 mm thickness. It is a single piece of foam with layers of foam added to it. It measurements are 6.5″ x 8″ x 6″, all pieces are glued together using PVA glue, therefore waiting time for the glue to dry is about 24 hours.


Painting the Scene
I have undercoated with a black acrylic.

After giving each module a grey base coat, I then decided to paint each one using metallic acrylic paint. The idea behind this is Coruscant in the capital and the entire planet is one big city and a lot of it would be metal.
Each one has been painted, and I’ve painted the pipes and the recesses of the doors with a black wash.


Store 2
Building the Scene
This piece of the same measurements is another shop front of different design.


Painting the Scene
I have undercoated with a black acrylic.

After giving each module a grey base coat, I then decided to paint each one using metallic acrylic paint. The idea behind this is Coruscant in the capital and the entire planet is one big city and a lot of it would be metal.
Each one has been painted, and I’ve painted the pipes and the recesses of the doors with a black wash.


Stall 1
Building the Scene
This piece of the same measurements as the others and is based on a market stall or food vendor stand.


Painting the Scene
I have undercoated with a black acrylic.

After giving each module a grey base coat, I then decided to paint each one using metallic acrylic paint. The idea behind this is Coruscant in the capital and the entire planet is one big city and a lot of it would be metal.
Each one has been painted, and I’ve painted the pipes and the recesses of the doors with a black wash.


Store 3
Building the Scene
The fourth building has been done, I have a nice street forming. Next step is to start painting these four.


Painting the Scene
I have undercoated with a black acrylic.


After giving each module a grey base coat, I then decided to paint each one using metallic acrylic paint. The idea behind this is Coruscant in the capital and the entire planet is one big city and a lot of it would be metal.
Each one has been painted, and I’ve painted the pipes and the recesses of the doors with a black wash.


Final Pictures


Balcony
Building the Scene
I’ve been asked if I was going to do any more with my Coruscant Underworld. At some point I’ll be doing more modules but because of space at home I decided to build up and create a display piece which my current pieces will fit into but adds another layer and maybe (you know this is going to happen!) a landing pad or two.
I’ve cut the back board out and measured the current pieces to this. Marked out where the balcony will go, how much dead space to use and a row for 4 new store fronts.


The balcony floor I have cut notches into wall side of the floor and the wall making a secure fitting. At the moment I am keeping the floor loose in case I change my mind with what I have done so far. Added a strip of LED’s under floor which lights up ground floor. The two LED’s hanging either will be attached to two pillars on under side of the balcony.


At the moment I am not too fussed about the reverse of this diorama because I have an idea for that side!
I’ve added support beams and the extra LED’s fit within them. Now I’m starting work on the buildings above. Unlike the original 4 these ones will be fixed in place. Once all the pieces are in place then I shall start shaping this.


I made two more facades.


The third facade put together.
This is the way!


I’ve made the final facade, scored metal plates and a couple of cents into the walkway and support pillars.


Next step to fill in the dead space above the facades before moving onto the rear of the model and adding a couple of landing pads.


Finished the building the front, I’m now turning my attention to the back.

Painting the Scene
I’ve base coated each facade, the walkway and then got carried away painted the front of the frame.


Using the same metallic paints I used for the lower floor, I set to work on the upper level, walkway and the merchant stall.


I’ve finished the upper level facades by dry brushing each piece.
The fascia, underneath of the walkway and all supports, I have airbrushed metallic grey with a touch of arctic blue in places. Also adding a layer of arctic blue along the front.


I’ve almost completed this section of this project.
Landing Platform
Building the Platform
I have built two towers on the reverse of the diorama, each tower will act as supports for the landing pad which will cover the top of the build. The length of this piece the platform will house two landing pads.


Originally I was going to have a merchant stand inside of the final facade but I made this too deep. Instead I’m having this at base between the two towers.


I’ve started scoring panels into the back wall of the landing pad. The battery enclosure for the walkway has been turned into vent with a couple intake pipes.
I’ve reduced the width of the landing platform and then added three load bearing braces for the tower side.


Finished etching the load bearers of the platform with two different designs. Added piping, etched plates onto the platform.
I found a packet of parasol lights, where I’ve added them around the first floor and as lights on the platform. Which to be honest I’m not 100% sure about:
- Because use they don’t match the first set of lights.
- I’ve tried to spread the 20 lights out between the two sections and it doesn’t look right. (I get the lights from Poundland which at the time of this writing under lock down is still closed).


I might add another layer of foam to the platform to cover the holes made with the lights and add all the lights to the under side of the platform pointing down?
Painting the Landing Platform Entrance
Using the same metallic paints as the reverse side, I’ve base coated platform side.


With the base coats done on the platform side, I made up a dark brown wash and painted inside all the recesses. When it had dried I dry brushed over the side.


On the reverse side, cutting up some cable and adding it as decoration. Along with adding a few more posters to both sides.


I just need to paint the platform and add the strip lights to both sides before declaring this piece complete.
Painted the roof, fixed the strip lights to both sides, created two small units to house the excess cable on the roof and battery pack underneath.
I still have a couple of finishing touches to do but in the mean time I’ve put it on the shelving which will be it’s home.


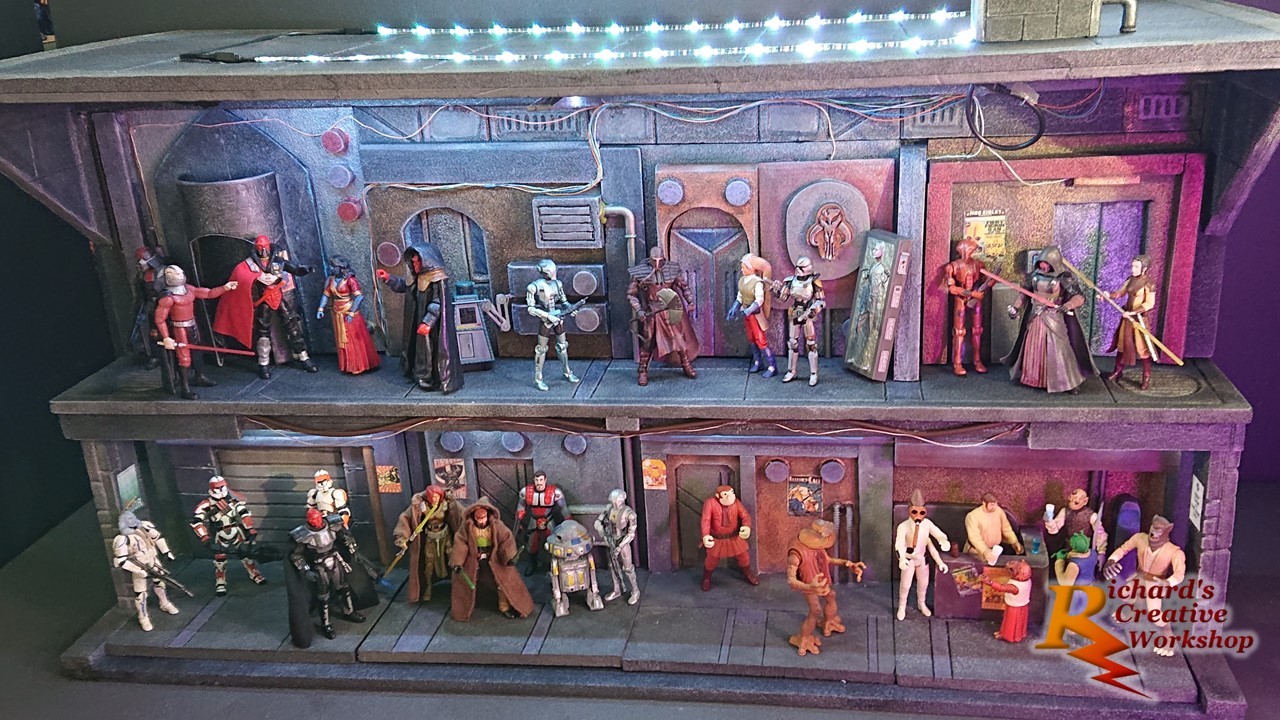
Final Pictures
Final pictures of double sided Star Wars diorama Coruscant Underworld / Landing platform in all of its glory.
Scaled for 3.75″ figures it stands at 34″ x 18″ x 10″


[ngg src=”galleries” ids=”32″ display=”basic_slideshow” arrows=”1″]