Mystical Ruin
I’ve started a new commission piece, a client has asked me to recreate a diorama he saw on the internet.
Building the Diorama
My client has asked that the measurements be 40 x 40 x 40 cm, so to start I’ve made the base using a 10mm & 6mm boards glued together. I’ve carved in the first row of slabs and my next job is to cut a 30 x 40 piece using 20mm foam.
I’ve glued the 30” piece onto the base, and once it’s dry I will be slabbing it. The back wall I’ve added a 20” piece of foam and at the request of my client, I’ve cut in a 10” door frame. I used a side plate to cut out the arch.


I have marked in 3″ x 3″ slabs, weathered them and applied cracks.


I’ve been working on the back wall in stages. First I added the brick work, scored and detailed it. I added an arch around the door frame, added a couple of pillars on either side below the pelmet which runs the width of the wall.


My next step is to make the two pillars, which will stand freely on either side of the steps and work out what to do with the door frame, add a door or something….
I’ve created a couple of pillars to the size of the wall, covered them with corrugated card. I’ve created a door which will sit in front of the portal.


Painting the Diorama
With the pieces made, I’ve base coated the model and will start painting this week.


I’ve added a layer of mid grey to the sides of the back wall, door frame and random bricks. The door I have applied an oak brown and a dark gold to the hinges.


I painted a black wash over all of the stone work and a brown wash over the wooden door. Once the wash had dried on the wall and floor, I dried brush a light grey over them and then added a brown wash over the cracks in the floor and edges of the tiles and steps.


Once the pillars and door has dried I will dry brush them before working on the accessories.
I’ve finished painting the diorama for now, I’ve dry brushed the two pillars and finished painting the door. Now it’s time to work on the accessories.


I’ve added blue leds around the door, glued tin foil and a reflective screen glued over the tin foil to give a glow to the portal. All of the LEDs are plugged into a breadboard, located behind the portal. am just waiting on a delivery of flicking leds to make a couple of lanterns for either side of door, and a handle for the door.


I have made two flickering lanterns for either side of door and I am now just in the process of making a handle for the door.


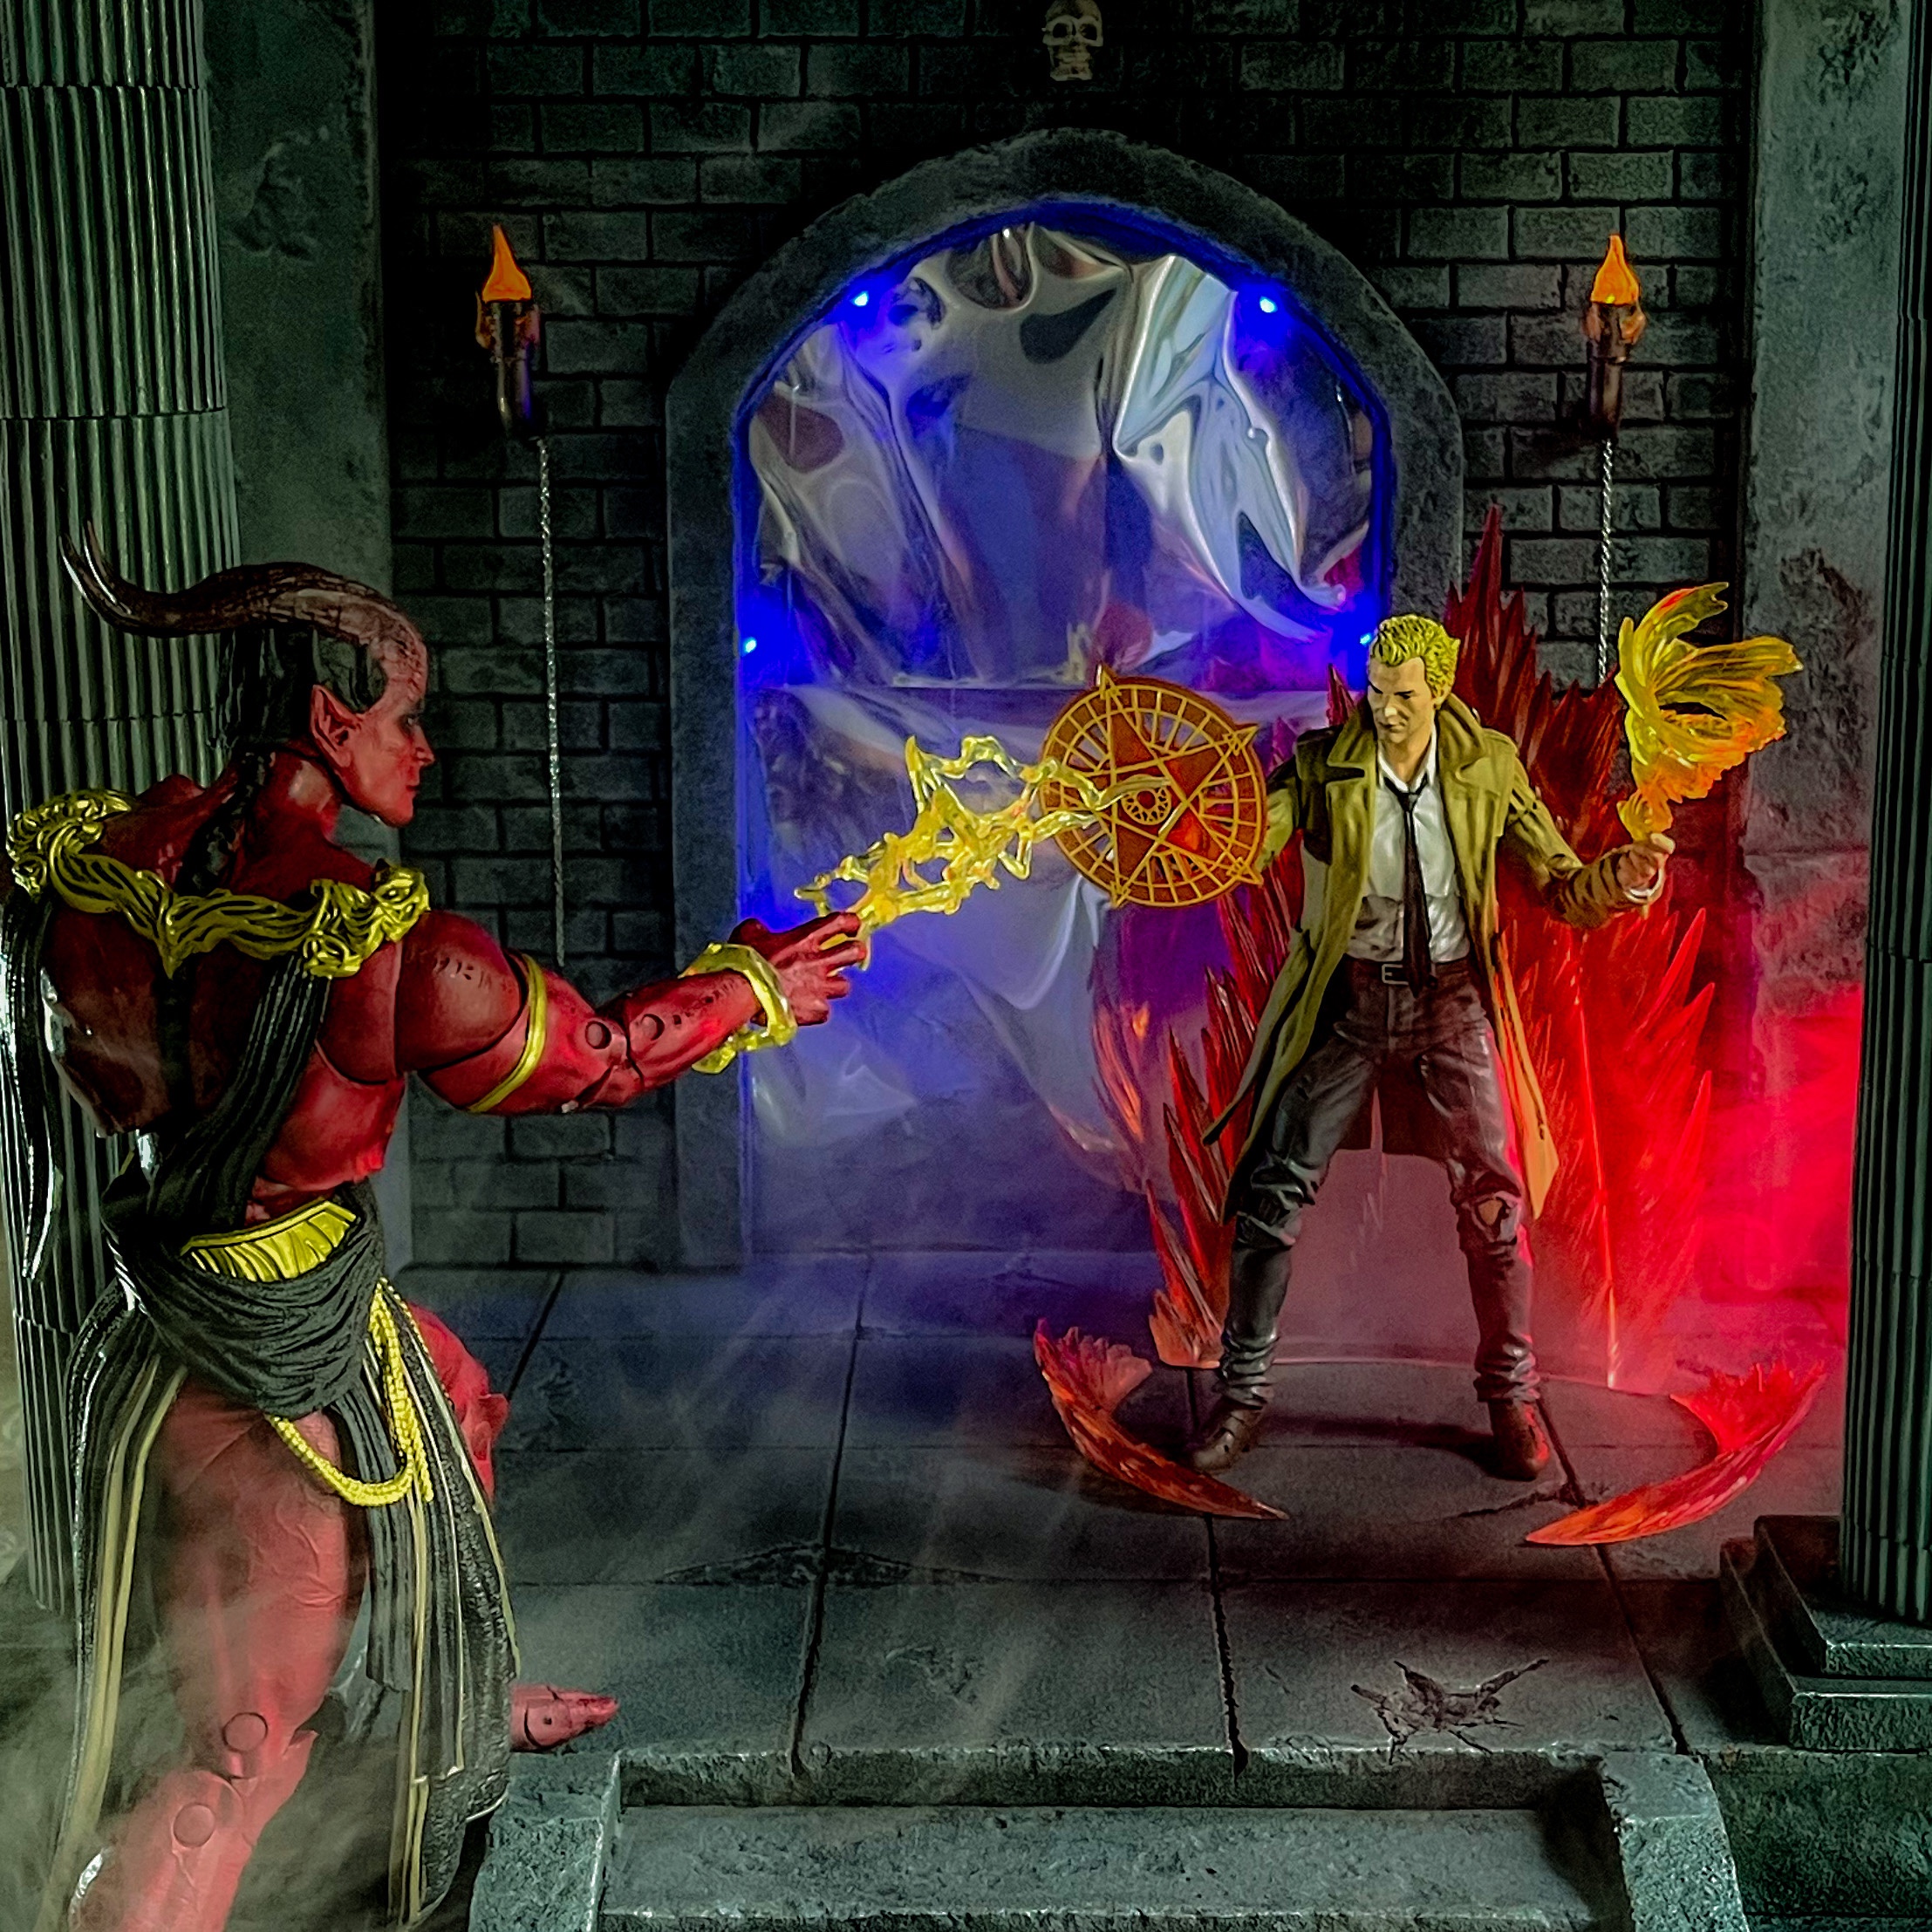
Final Pictures
After adding a door handle to the door this piece is finished and ready to be shipped to its owner.


