Doctor Who’s 1st Tardis Diorama
A commissioned Tardis diorama from the 1960’s
I’ve started a new commission piece. I’ve been asked to produce a diorama of the first Doctor WHO’s Tardis control room and console.
Building the Tardis Console
While I’m busy finishing my tavern piece I am using my 3D printer to make his console. So far I’ve printed the base, console top and six panels. I printed off another version but it is a little small against the scale of the figure.


Once the console is finished, I plan to make the control room out of foam board.
After printing off 3 other console bases I finally got a decent print. I have now finished printing off all the accessories for the console and it is now ready to paint.


My next steps is build the control room, where I have cut out the foam board for the 3 walls to which I now need to cut the holes (the round things).
Building the Tardis Control Room
I’ve been working on the commission of Doctor Who’s 1st Tardis Control Room. All console parts have been printed and I’ve added undercoated.
I’ve started working on the control room, using 2 pieces of 6 mm foam board for the inner walls. I used an apple corer to make the round things for the two walls. I have started to shape the third wall to represent the Fault locator wall. The wall still needs a little more work.


I’ve been working on finalising the third wall of the original Doctor Who’s Tardis control room by adding the vents above the computer wall and the monitor. Having realised the wall was originally too long, I cut off a section of the wall. I have used cardboard tubes for the vents, cutting a length of 6mm foam board, gluing 5 x 0.25″ cut cardboard tubes to the underside, I cut five lengths of tube to 0.8″ and glued them to the topside, directly above the tubes below. The monitor is made from two pieces of 20″ foamboard cut to 1.5″ x 1.5″, glued together and then sanded and pressed into shape, it was then glued to the centre of the vent shelf.


Painting the Tardis Control Room
After months of my daughters illness, I had lost all inspiration for building dioramas and miniature painting because I’ve just not been in the mindset for it. It is now slowly starting to come back. Things are starting to get better along with my inspiration.
The Tardis was undercoated with black spray paint, and now I am applying a white base coat. I cut out a floor made up of 2 pieces of 10 mm foamboard, which I have cut into 3 inter joining pieces (to make it easier to pack away and ship to my client). I have also applied a white base coat to the floor.


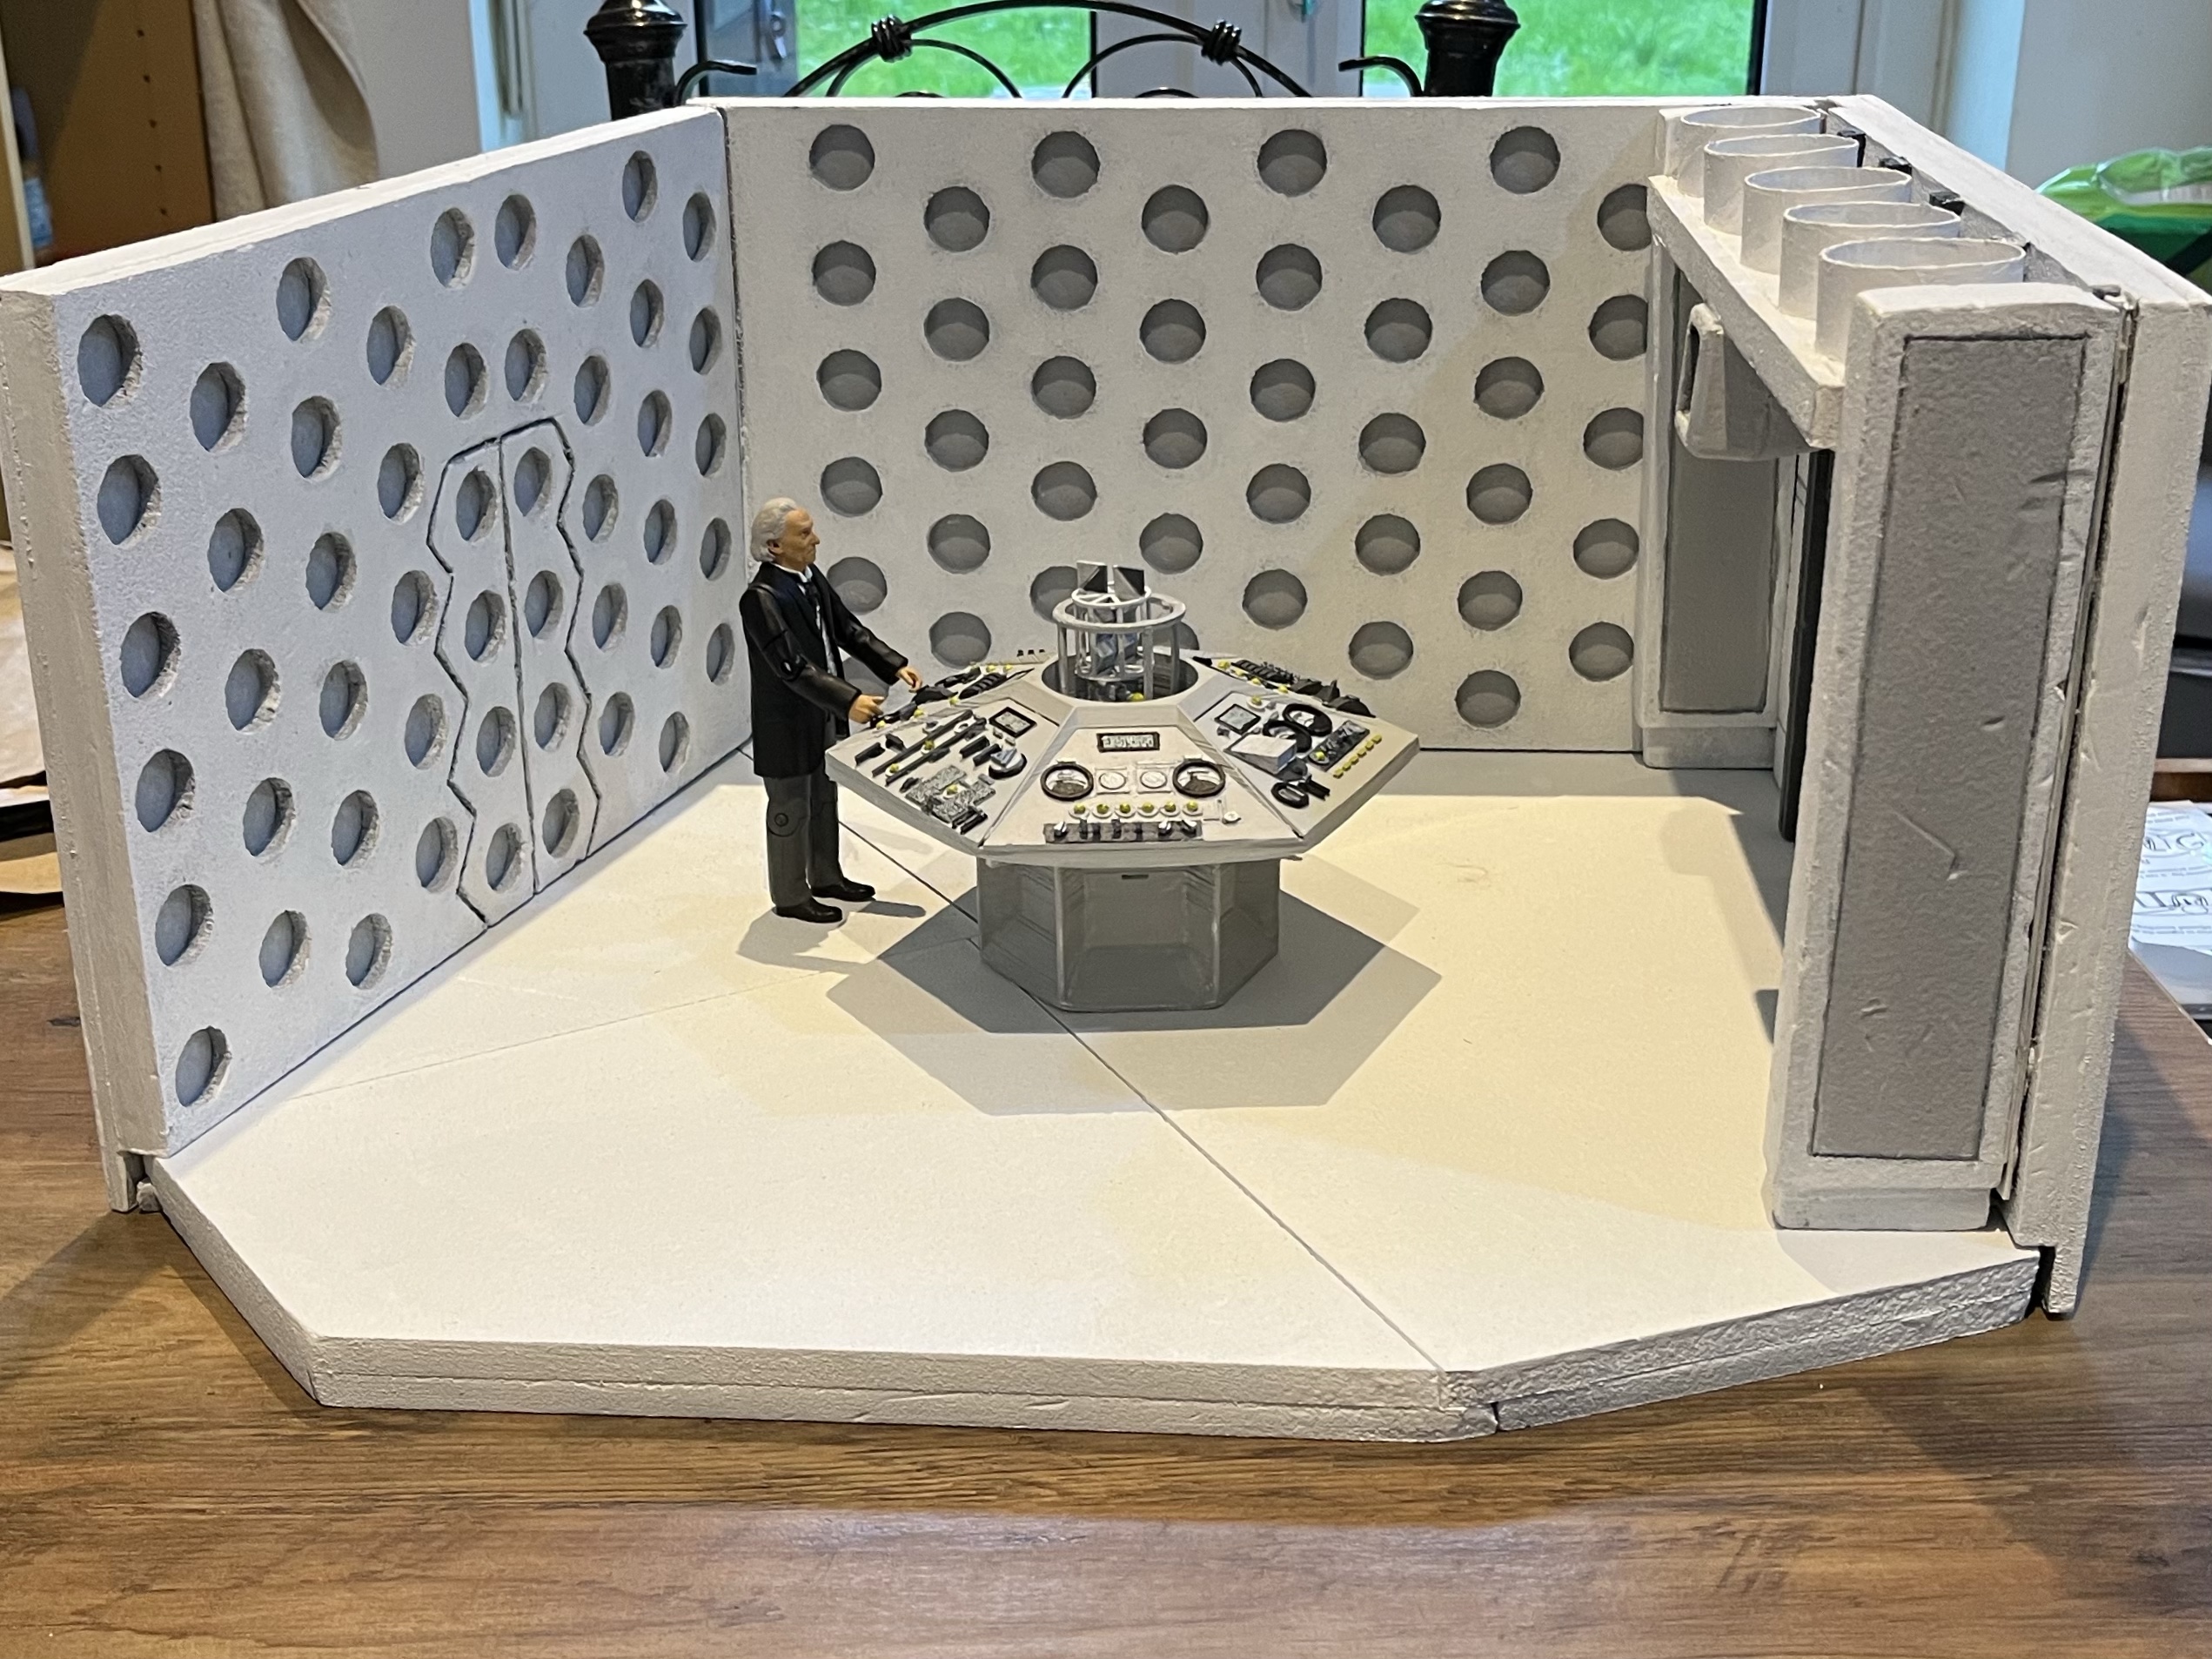
After taking inspiration from the modern take of the original Tardis, I’ve opted for white walls and floor, light grey for the inside of the round things and over hanging monitor. I am part way through painting the dials, switches and buttons on the console. The walls I have almost finished painting them and the floor needs another layer of paint.


I have finished painting the floor, the walls and the console. I just have a couple of finishing touches and then this piece is complete and ready to ship to its owner.


What I have done is add another layer of foam to each wall which has a strip of magnetic tape that connects with a strip of tape on the side of the floor. I have also had to cut the large triangle floor piece in half, to make it easier to find a box to put in for shipping.


All I need to do is add a final coat of white paint to the back of the 3 walls and then it’s done.