Warehouse Loading Bay
I’ve started a new warehouse loading bay diorama, this one is a smaller cut-down version of my last diorama. This version will only consist of a back wall with a garage door and a sidewall with a smaller loading area.
Building the Scene
So far I’ve cut the two walls, marked the brickwork on the two walls, cut out the garage door, replacing it with the corrugated card. I’ve also started to build an extension as I did previously.


The next steps will be a to add the brickwork and cut out a smaller loading door with a loading ramp.
I’ve spent time today finishing marking out the brickwork in pencil and then using a fine head pottery tool to score into the foam. I cut in a smaller dock door and replaced the foam with the corrugated card, then gluing the three pieces together which will be glued to the wall at a later time. Like the previous warehouse diorama, I made an L-shaped dock ramp going around the small building using three pieces of 20mm foamboard, which are glued together using PVA glue.


I’ve tidied up the edges, added magnetic disks to hold this piece together, added a couple of steps to the loading platform. All that is left is to weather the bricks and floor before I can apply an undercoat.


I’ve finished this section of the build phase by weathering the surfaces of this model. It is now ready to be undercoated.


Painting the Scene
After applying a black undercoat, I’ve sponged on a basecoat of burnt sienna and umber with a touch of white to the brickwork and an even lighter version to the base of both walls. The concrete areas were painted grey, also using a sponge and the area above both docks doors.


Before repainting the bottom of the walls I mixed up a darker brown and sponged it over the brickwork. I used a black wash on the concrete area above the dock doors and cracks on the floor and concrete ramp.


I started with airbrushing the bottom of the walls with a light concrete airbrush paint, followed by airbrushing gunmetal grey on the two doors. When they were dry, I shaded the recesses of the walls and above the doors and dry brushed a light grey over them.


Using my airbrush I added a black wash followed by a brown wash over the doors and then a brown wash over the bottom of the walls. I have added switches for the doors, built an air-conditioning unit, and painted a drainpipe.


I also need to finish the floor and the concrete loading area.


I finished painting today, using concrete grey airbrush paint on the docking ramp and a layer on the floor. Using a brown wash to add a couple of tyre tracks leading out of the dock door and weathered the docking ramp and steps. I dry brushed a light grey over the cracks on the ground and docking ramp. The drain pipe was painted gunmetal grey before been given a dark wash and then glued into place. The air conditioning unit was painted white, given a brown wash before being glued to the wall.


I am wondering if I should add a couple of decals to the walls and build a couple of wooden pallets?
I tried my hand at a paper weathering technique introduced to me by TechChucker. I printed off my signs and laid the paper in a roasting pan while waiting for the kettle to boil. I brewed a jug of tea while making myself the all-important morning coffee. While the tea brewed I have oven warming to 200 degrees and I play Lego Superheroes 2. After about 10 minutes I pour the tea into the pan and return to my game for 15 minutes. I dispose of the tea at the allotted time and pop the pan into the oven for 15 minutes and return to my game. When the timer goes, I take the pan out of the oven and the paper is cooked.


I have to admit the paper looks great for a treasure map but the next time I do this, I won’t let the tea stew for as long. I cut the signs I want out and glue them to the diorama using PVA glue.


I was going to make a pallet and a barrel to go with this piece but I feel that this would just crowd this piece. Therefore I believe this piece is now finished, my final pictures are to follow.
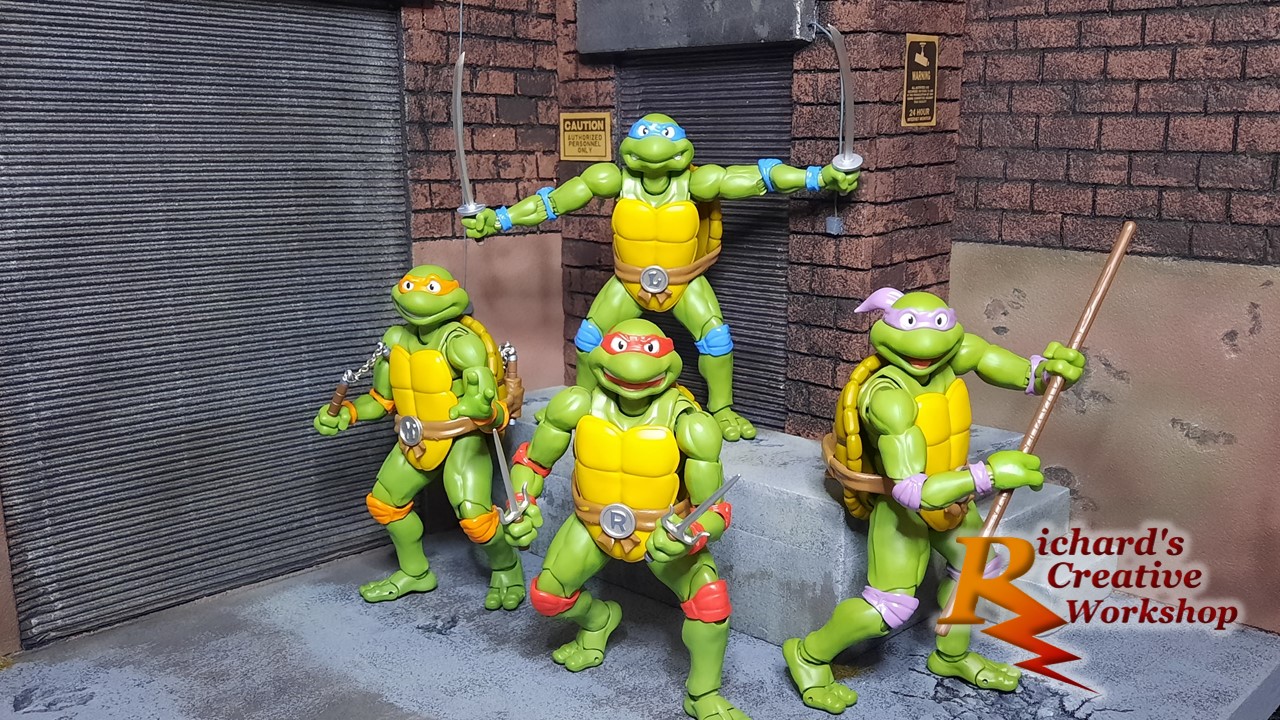
Final Pictures
At the time of this writing, I have be summoned for Jury Service which is why it has taken me over a week to post these pictures. I have used three different toy genre’s show that this is an all-around piece for most toy lines.


