Rogue One: The Streets of Jedha
Starting another Star Wars diorama. The brief is to make four-module tiles 1ft x 2ft in size, each joined together with magnetic tape and the architecture has to be based on Jedha from Star Wars Rogue One.
-
Building the Scene
The first section will be a street comprising of two wall braces on the first tile, a tower in the far left corner. The right side will have another wall brace with a bar and terrace. The second section will be a spaceport with a doorway between the two sections.
So far the tiles have been cut, a pair of wall braces cut and glued to the first tile. I have made a corner tower with steps, which when the steps have dried will be glued to the second tile.
I’ve done some more work on the corner tower. To start with I cut a doorway and then added a walkway.
Next, I wanted to develop the second tile by adding a couple of doorways. The first doorway was built into a tower, the second was built into the wall next to the tower with steps leading to the doorway
I’ve done a little more work with the latest section. To start with I cut away the small section of floor to the left, scored in some brickwork, the layered a piece of 6 mm board over the top. Later down the line, there will be extra pieces added along with cables and pipes. The next section to start will be the bar area which will have a beer garden area, along with another wall brace. With the extra pieces not glued into place, I can play with the layout to see which works better.
I’ve started working in the bar area, I’ve cut out the basic shape and beer garden (size of which might change).In the corner building, I’ve removed the wrap around stairs in favour of central steps with walls in front of the walkway. Before I carry on working on the bar I wanted to find a combination that will work before I start to incorporate them into the tiles. I think the final picture works best.
Woke up ridiculously early and thought I’d carry on with this building. I’ve given it a pelmet, a roof (which I’ll add something else to it), a fixed door, I’ve added another to the layer to base, when that’s dry I’ll add in steps. When it’s painted I’ll add piping, just wanted to see what it looks like.
I’ve been looking at the space between the two towers on the first tile, thinking it needs something. I’ve added a small structure that is fitted between the bases of the towers. I then started to add cracks and texture to the surfaces of the tile.
Rather happy with how this has turned out.
Adding some more facial touches, after it’s painted I’ll be adding cables to the walls.
I’ve made a piece of equipment that you find dotted around Jedha. Once finished I glued it to the side of the corner bar.
I then built roofs for the two other buildings.
With this done I started to work on the second area. The idea is to then have a walkway /bar/storage area on the left, which will curve around and blend in the back wall. I’ve started with cutting cardboard cuttings, which I’ve used to cut those pieces in foam board.
The first section will have a walkway on top and underneath will either be a storage alcove or can be a bar, at my client’s discretion.
The second section is a frame to which will be built to give the hanger a curved wall.Cutting four strips 3″ x 12″ and glued them to form the curve. I then cut a smaller piece with a doorway at the beginning of the curve.
The next step is to make a static door and then a few more strips of different widths to finish the back wall. After that, I will be adding a fascia to the front of the underneath of the walkway, a roof to the curve along pipes.
I’ve had a very productive day. It started with adding a ceiling to the corner room, then cutting a piece of foam and carving it into a door.
Cutting a couple of lengths of foam board to complete the curved wall. I cut a length of 6 mm board to create a front for the bar/storage areas in the hanger. I then added foam circles to various areas of the hanger. To finish the build of that area, I have added cracks into the wall.Painting the Scene
I have base coated the three buildings and pipes from the first area.
While they are drying I turned my attention back to tiles of the first area, adding texture, imperfections in the wall (broken plaster, cracks in the wall).Apart from a few minor touches, this completes the build of this set. The next step is to finish off sanding the last tile after the glue has dried and then base coat the rest of this piece.
-


Got my paint delivery and now base coated all the walls and buildings. Tomorrow I need to apply a second coat to some of the pieces before painting the doors and layering.


Second coats have been done, I’ve also fixed the walkway and the first facia to the central tile.


Spent the afternoon airbrushing a second lighter brown layer over the base coat. Tomorrow I’ll paint the doors and bricks and adding shading.


Today I painted the doors, pipes and then added shading to the whole piece.


Just need to edge and apply the finishing touches.


I made up a very pale brown and dry brushed over the entire piece. Not only has it picked up the highlights, but it has also lighted up yesterdays shading.
With the painting done, it’s time to start the final touches.


Finishing Touches
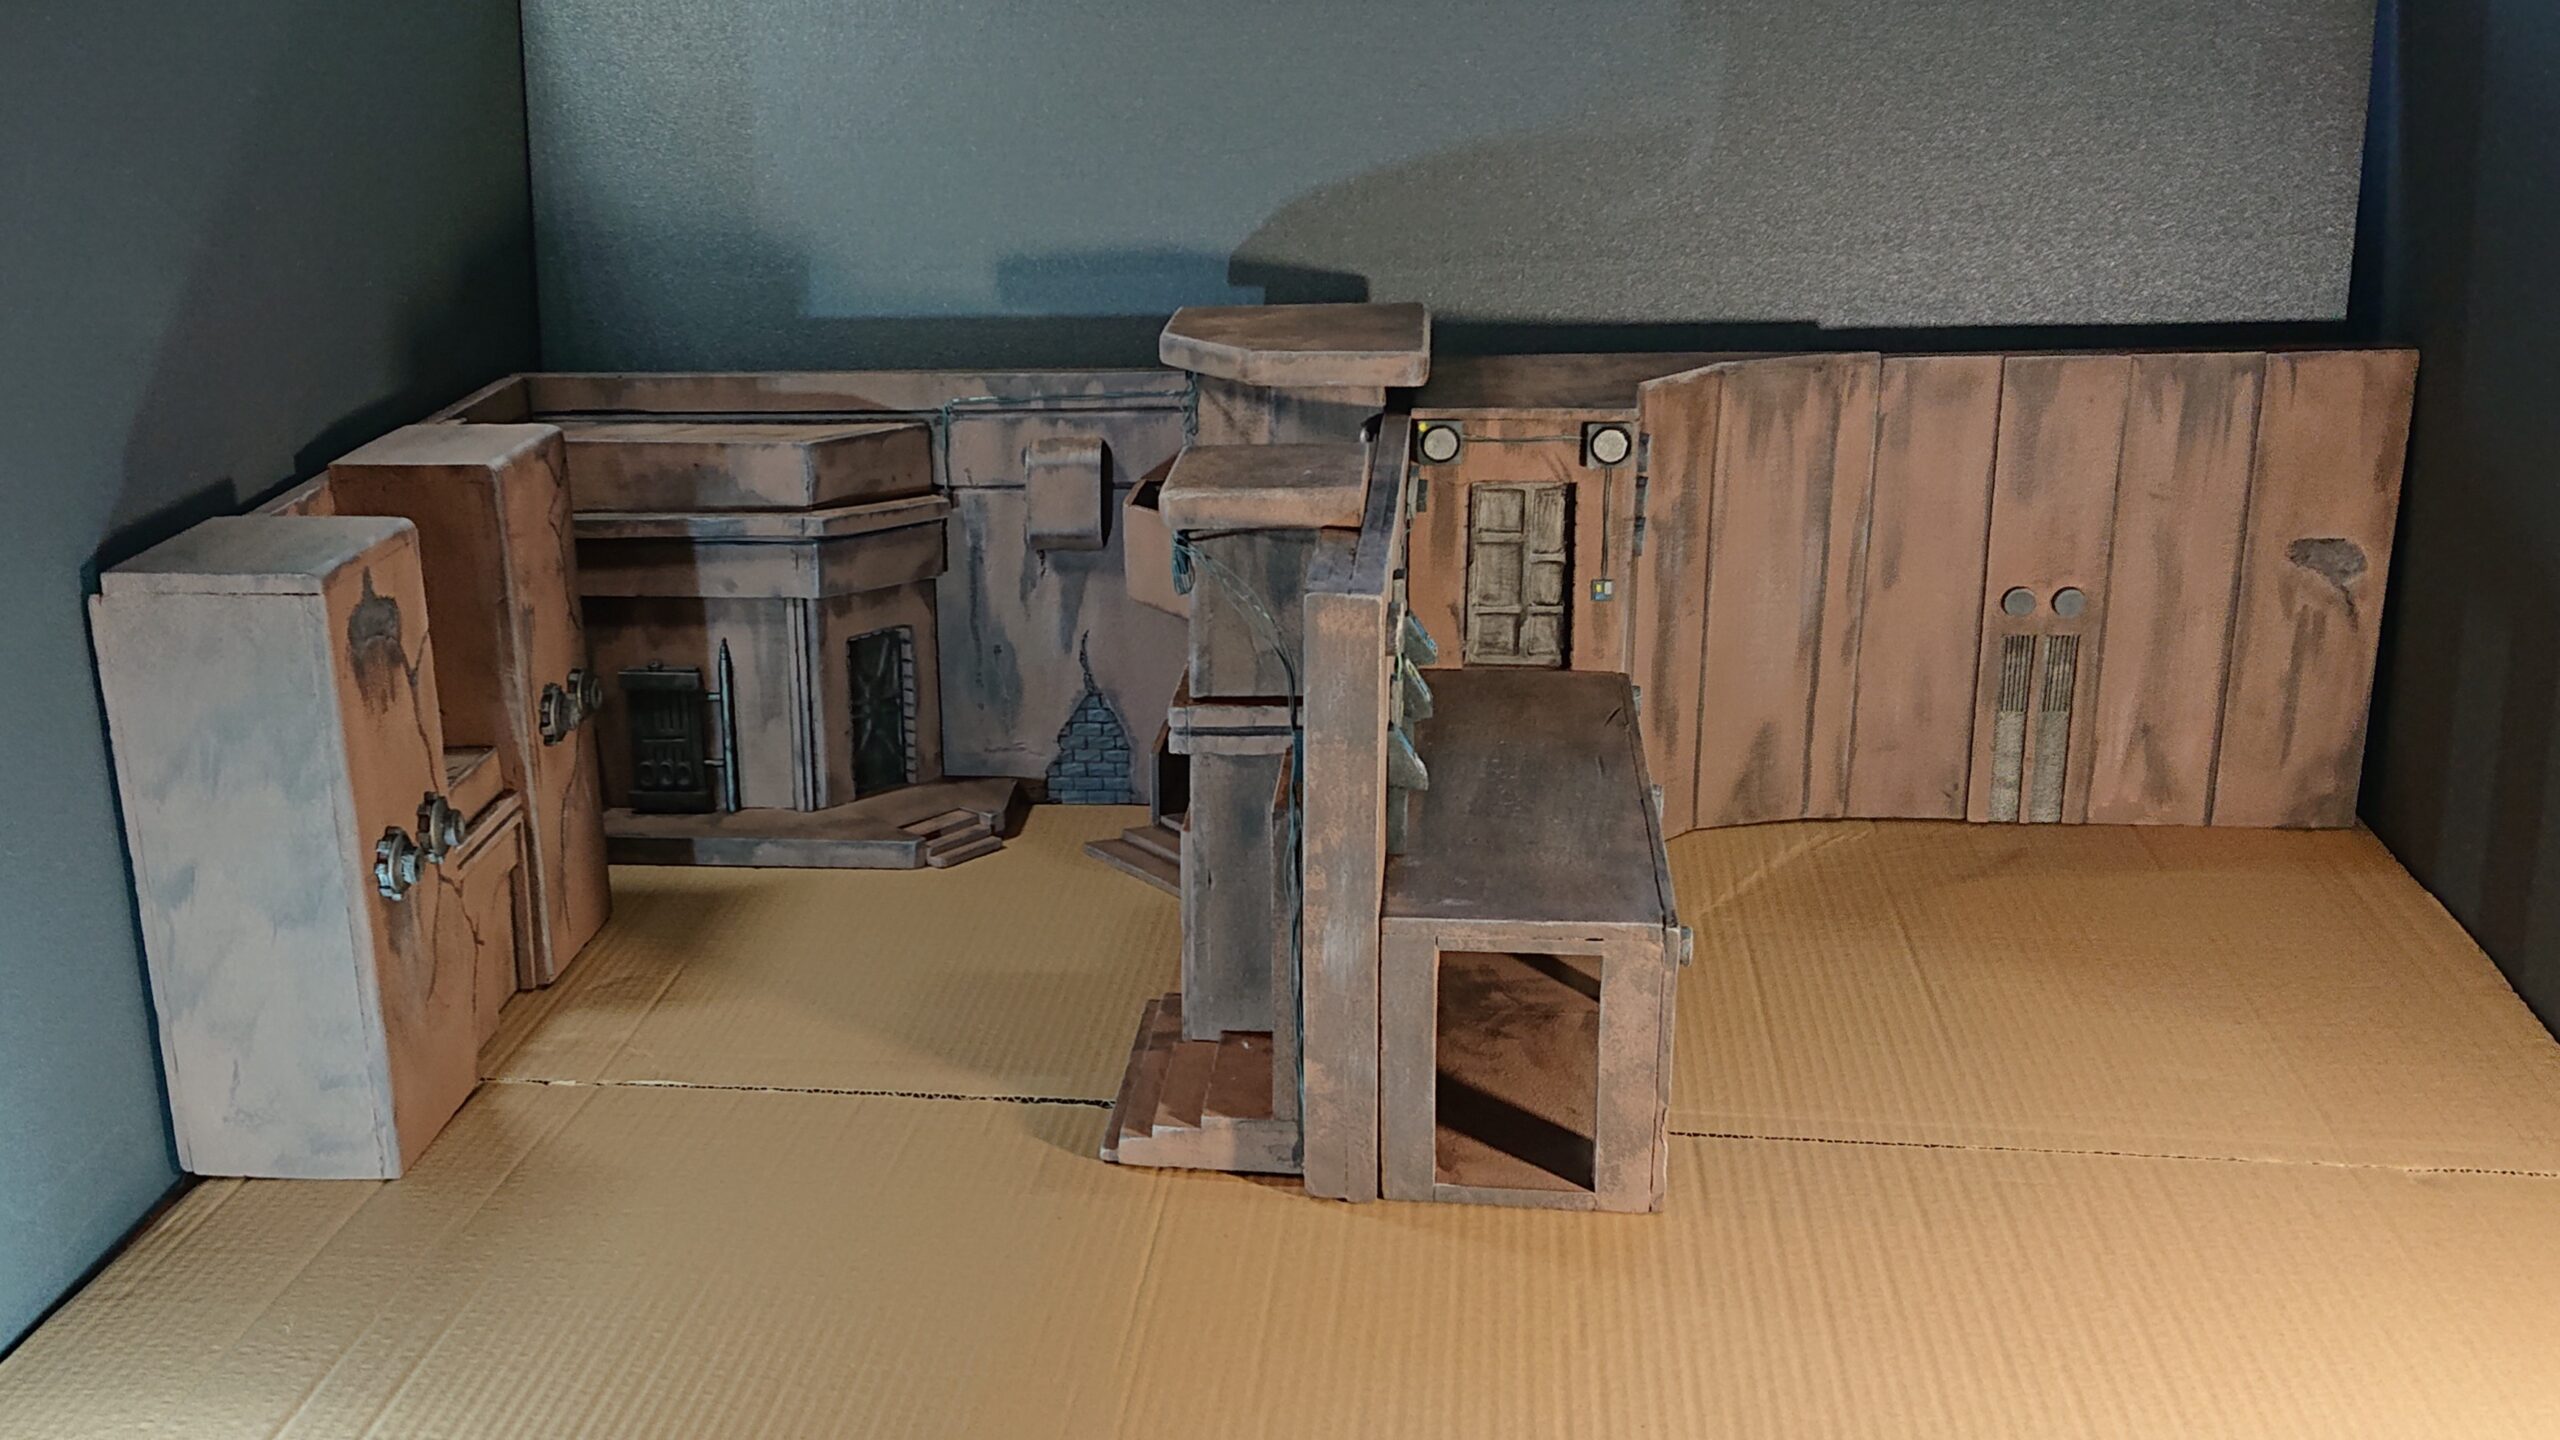
I’ve created four-wall consoles for the spaceport, three for the walkway and one on the ground. I also made up a few wall greeblies to finish off the spaceport area along with adding cables to the walls.
For Jedha street I have added cables running the length of the right side, cables running around the curved corner building. To finish off this section, I added a couple of more cables on the back wall, starting from the corner building, running up the wall to meet the other building.


This completes this commission, I’ll add more pictures this evening and tomorrow I’ll do the final pictures.


