Rooftop Snake Eyes Log Cabin
I’ve been commissioned to create a log cabin for the new 6″ G.I.JOE Classifieds series based on the classic 80’s comic.
Building the Scene
The specifications I’ve been given are 30″ x 15″ x 15″, it is to be made from foam board and designed to be flat packed. I have been asked to do both exterior and interior.


With the sheets still drying, I have cut notches into the inside walls for the walls to fit into and for the floor. When the sheets have dried I will start scoring the foam to make it look like a log cabin.


Still working on the overall structure of this piece before going into detail. Working on the foundations adding slots into the floor and then drawing on the “logs” on the front at 1″ width.


Today I’ve finished marking out the logs for both the exterior and interior. I’ve cut out four windows and a door. I’ve also started scoring one of the exterior.


I spent time shaping the walls internally and externally, to look like they are made from lengths of wood. My client asked if I could fit a door in one of longer walls between the windows. The next steps are to score the floor and porch before starting on the roof.


The wooden floor is now done. I’ve marked out 6″ x 1″ beams running the width, then scored the floor before taking a wire brush running it width ways across the floor. With this now done, it’s time to work on the roof.


With the floor completed, it was time to bite the bullet and make the roof. Cutting two pieces 23″ x 5.5″ which gives 1.5″ over hang on both sides and two smaller pieces which fitted inside the frame of the cabin. The roof pieces where glued onto them with PVA glue, when the pieces are dry I’ll score the detail onto them.
The last piece to make before making the doors and windows is the stone chimney.


I’ve added a chimney breast using three 10 mm strips glued together, then scoring in bricks. I’ve also marked out 1″ thick slats running the length of the roof. Just need to score these and then it’s off to do the doors and windows.


Using bolsa wood for the doors and door frames, the cabin has two working doors.


The last bit to do before I start painting is to make the ground surrounding the cabin. I’ve done this by using ordinary garden soil mixed with PVA glue. Making the most of the one day of sun this weekend, I’m leaving it to dry outside.


Now I can start painting the cabin.
Painting the Scene
First layer of paint applied to exterior, once dried I’ll use the same paint for the interior.


The base coats of the cabin walls are now finished, I’ve used a dark brown for the interior floor, nut brown for the porch floor and one of the doors.


I started by mixing a dark brown wash and painting it between each of the logs both internal and external, the crevasses of the door and roof.


Mixing up a light grey with a touch of light blue for the chimney stack. When that had dried I went in between the bricks with the dark brown wash.


When the wash on the walls had dried, I dry brushed the exterior with a dark brown.


I then added white to the dark brown and dry brushed the interior walls, the floor and roof.


I took this piece outside to do a couple of test shots and show how big the cabin is, my cat thought I built him a new house.


What’s left to do is paint the border of the base black and add the windows.
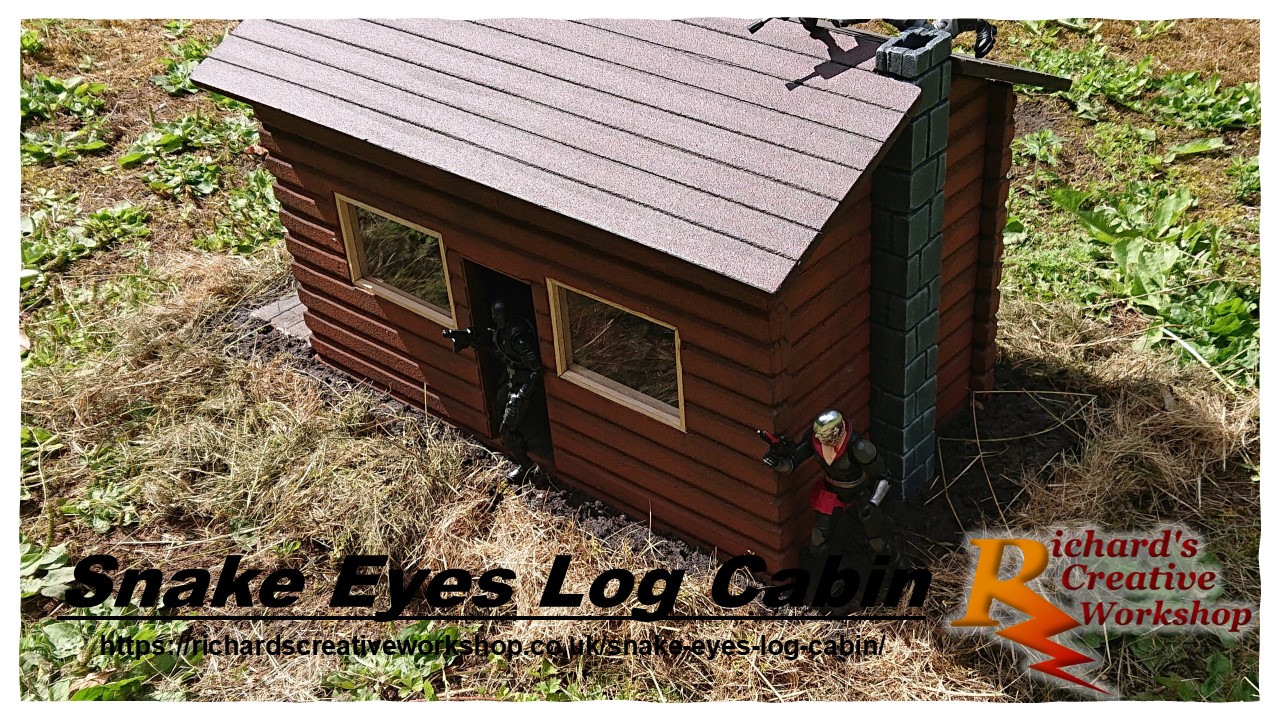
I’ve added the windows and window frames. All that’s left to do is paint the edges of the base and stain the window frames and then this piece will be complete


The windows frames are stained, the base edges have been painted. Quickly checked with my client if there was anything else he wants before declaring this piece finished and final pictures can be taken.


