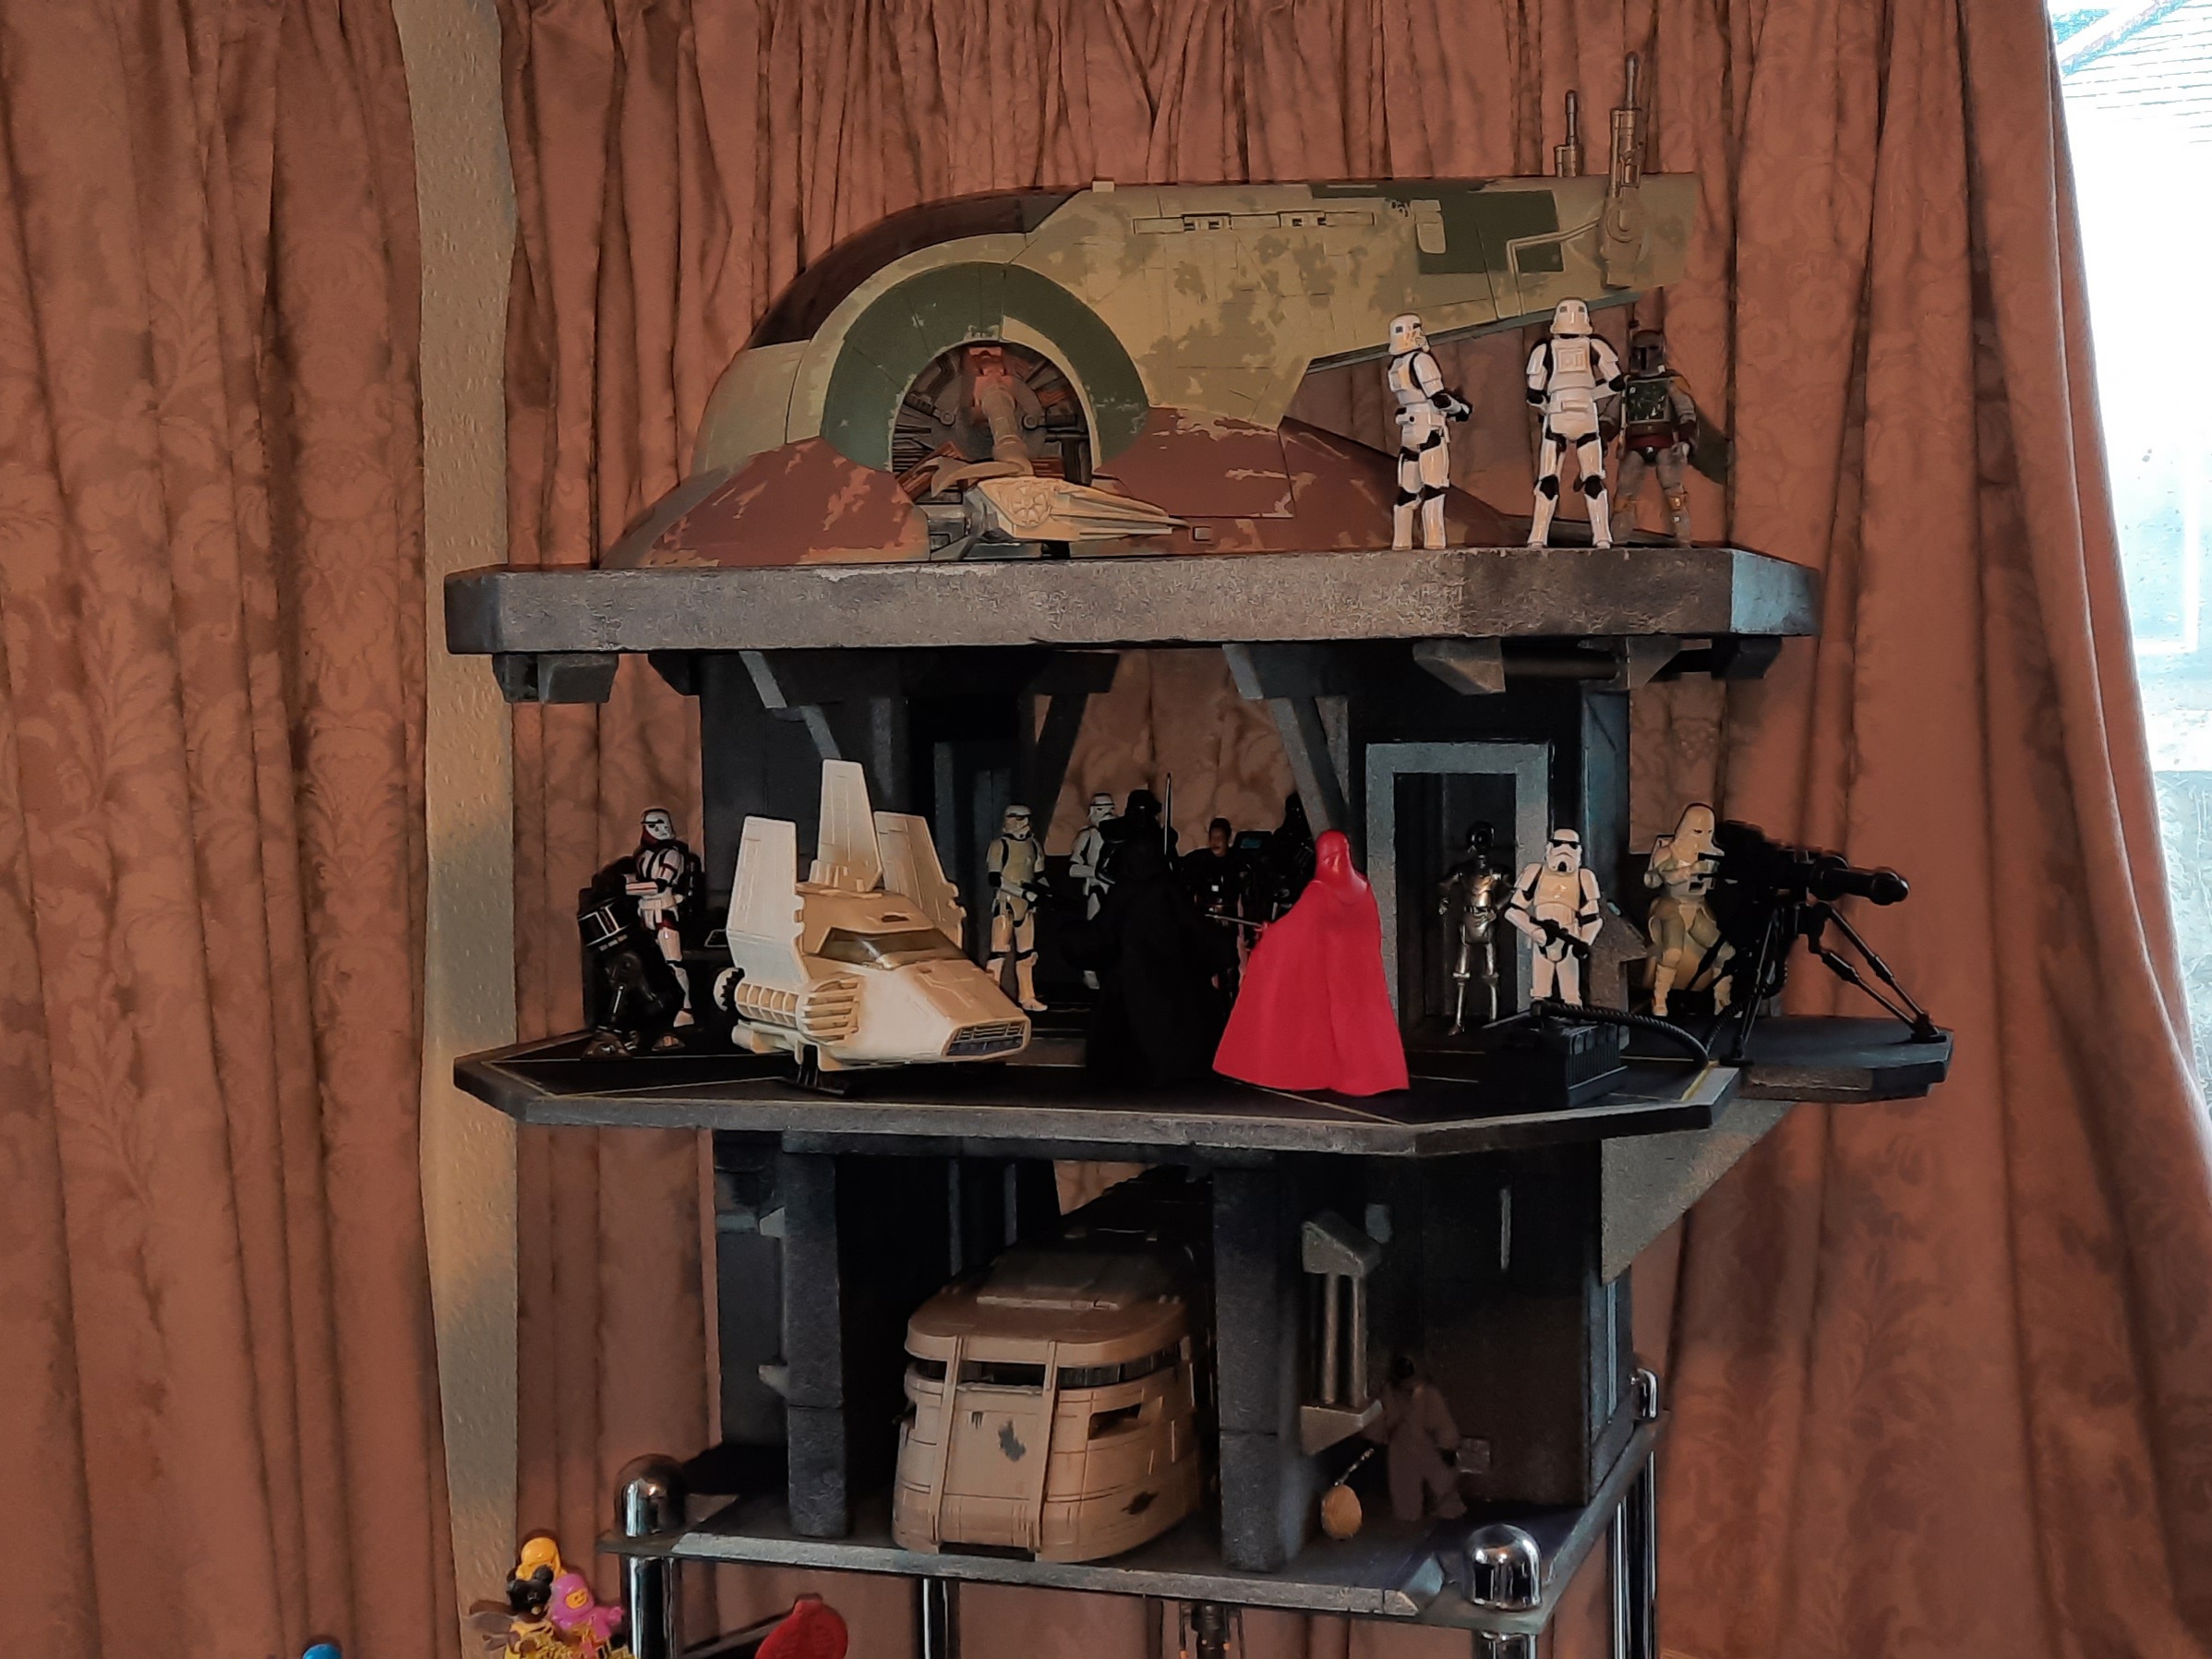
Landing Platform
First WIP build of 2022. I’m putting together a Star Wars 3.75″ display piece that will fit on top of some glass shelving I have. This diorama will be an outpost, which will include a garage, command centre with a landing platform.
Building the Scene
The area I have to work with is 15.6″ x 11.8″, I have cut out the base to this size, making room for the 4 screws holding the top plate to the legs of the shelving unit, this piece will live on. I’ve made the two towers (4″ x 4.75″ x 15″) that will support the landing platform and cut out the foam board which will be the command area. Right now it kinda resembles the old Kenner Ewok village.


I have started shaping the rectangular floor, cutting out a section on the side which can be either an E-Web gun emplacement or a vintage mini rug landing platform. The larger overhang will be a landing platform for a mid-size ship like the Phantom, fighter, etc, while the front will be a walkway with consoles. Under the overhang, I have constructed a doorway for a troop transport park.


My next steps are to make the entrance under the walkway for the front/rear of the transport bay before marking the foam with tiles.
I have finished making the front entrance of the transport bay before cutting out a piece of 40 mm foam for the landing platform. This piece will now need to be cut down so it’s not just a square slab and add braces coming from the towers to hold it in place, but that needs to be done after I have added detail to the foam.


The next steps is to shape the platform and then I can start detailing this model before adding barriers and braces.
I cut down the landing platform to a more suitable size that still fits Slave 1 and the Falcon. I then added a small layer of foam board to the side platform to strengthen it. Once I have added the detail I will then be adding a couple of supports.


My next step is to start detailing.
I have started detailing this piece from the ground up. I have started with the floor and the extended entrance by etching in tiles into the foam.


Next, I will start with the support pillars before moving onto the floor.
I’ve spent time today detailing the support towers by etching in panelling to the front of both towers. I then spent time detailing the left tower. My wife was about to throw out a broken folding crate until I noticed the pattern of the sides. I cut out a couple of sections and used them as light walls.
I still need to detail the inside of the tower before moving onto the second tower.


The detailing of the towers is now done except for around the two top doors, which will be done during my final touches. During detailing, I have not only done the outside of the towers but inside too, I have left one side of the towers loose until the inside of the towers has been painted.


With the towers done I have started to work on the lower platform. I have detailed the floor and the next steps are to make a barrier to run the length of the walkway, stopping at the small side platform and the rear platform (modelled using the Phantom).


I made a barrier that runs the width of the walkway on the first level. I have also etched panels onto the top landing platform, which marks the completion of the build right now.


My next step is to start painting this, here are some WIP action pictures.


Painting the Scene
After applying a black undercoat, the bulk of the base has been sprayed using gunmetal grey. I have then used a black wash to pick out the details on the two towers.


For the lift interiors, I’ve used steel paint for the girders, a light grey for the walls, a red wash for the lift floor and a metallic red for the circle in the middle.


The first floor is still only partially finished, again I have used gunmetal grey and so far used steel and artic blue on various panels and borders.


The landing platform which needs a repaint, I’ve painted using artic blue but it has not turned out how I wanted so I will be adding a second coat or spray black and start again. I have added a steel border to see what it would look like.


I resprayed the landing platform and a couple of sections on the smaller platform with artic blue. After work, I painted the light walls, then using a bright yellow wash I painted around all the detail on the first floor.


My next step is to start working on the undersides of both platforms.
I have finally finished the overall painting and build for this piece, to finish this off I need to add a couple of consoles and a bit of piping underneath the landing platform.
To get to where I am now, I etched panels to the underneath of both the platforms and sprayed the bottom one steel and the top one gunmetal grey. I sprayed the edging of the platform with steel.


For stability of the landing platform, I have added braces to either side of the two towers, otherwise, everything would have to land centrally on the platform and not be too heavy. I also added to extra door frames to the upper floor and painted all frames a blue/grey colour.


I have finally finished making and painting the consoles. With the consoles glued in place, this completes this build and it is ready to sit upon the shelving unit it was made for. In the next house, the shelves will not be butted up to some curtains.


My usual final pictures will be taken soon, hopefully before I move house!


