Warhammer 40K Basilica Diorama
I’m starting a new diorama which will be mainly aimed at my JoyToy Warhammer 40K but scaled enough to accommodate 6/7″ figures. The idea is for a ruined gothic-style building.
It will measure 18″ x 17″ x 12″, made out of foam board, held together with magnetic tape and designed to be flat packed for shipping and storage.
Building the Scene
Since I first started painting Warhammer 40K, I have wanted to make a diorama for them. I was going to start one last year for the McFarlane 7″ figures but that project never started and just remained an idea. Now I have a number of JoyToy 1:18 scale Ultramarines, the idea has now begun to take form. The idea is to create a gothic (possible ruin/battle damaged to stay within 40K) inspired structure, which could also be used for 6″ – 7″ figures.
I started with using a piece of 1.25″ piece of foam board for the base and then cut four pieces of 6mm & 10mm thick boards to the size of 11.5″ & 17″, then a back piece (again using 6mm & 10mm board) of 11″ x 17″. Once cut the pieces were glued together and magnetic applied to hold the sides to the base. At the time of this writing, I have only ct out 2 steps and glued them onto the base but another two steps will be added.


I’ve started working on the side walls, cutting out two arches from a piece of 10mm foam board and then cutting two borders for each of the arches using a 6mm board. The pillars are made from cardboard straws, with all the pieces cut and sanded they were glued to the wall.
The next step is to repeat this process on the opposite wall and then start work on the back wall.


I have created the arches and columns for the opposite wall. My next step is to work on the back wall.


I’ve decided to place a central doorway on the back wall. After researching Warhammer 40K architecture I settled for the large double door with the sign of the Aquila engraved on the double doors. I hand drew half of the Aquila on one door and then traced it onto the other door, after it was drawn onto both doors I then gave it some depth. The doors were then glued onto a piece of 6 mm foam board, and then two 1″ thick pillars were glued to either side of the door as a frame, to complete the door frame a piece of 10 mm board was glued over the top of the door to complete the door frame. To complete the top of the frame I etched in a bit of detail, the sides of the doorframe still need to have detail etched into them. To complete the look of the door, I created a pair of gargoyle beaks upon which the upcoming floor will rest. To finish, the door sits on a step measuring the width of the door.


I have added extra detail to the door frame and started working on the floor pattern.


I’ve created a frame for around the door, 6 little alcoves which sit on either side of the arches and then finished off by creating an air vent which you see a lot of on Warhammer scenery and placed it within one of the arches.


I’ve been working on the upper floor of this Warhammer 40K diorama. To start with, I have etched out a floor which is made up of tiles and girders. On the side walls, I have added a couple of arches with a sword emblem in the centre of each arch. In the back wall, I have placed two columns and added a relief pattern on either side of them.


I have created a gothic-style computer console which sits centrally on the top floor, there are still extra details that will be added soon. I have started to add some extra details to the walls, the door, and the floor.


I have finished off the foam work detailing by carving bookshelves into the two alcoves on the first floor, I’ve also added Eagle reliefs which at the top corners of the arches.


I have spent time casting skulls and an emblem from Games Workshop scenery and Joytoy figures and placing them on the set as you would find them on a piece of Warhammer 40K scenery. Apart from tidying up the top of this piece, it is now ready to be painted.


Painting the Scene
Painting has begun!
First, the entire piece was given a black undercoat, and then a coat of grey was added to the walls and floor.


The door was sprayed with gold and then a darker grey was used for the frame. That grey will be used for the arches and pillars. The console and pipes have been given a silver base coat.


Painting of this piece is progressing, I have finished base coating the floor, and I’ve added a coat of a darker grey to the arches and pillars but uncertain whether I should add another darker coat? Before life took over I then started to apply gold to the console and the lip of the first floor but as you can see they still need work done to them.


I’ve been reapplying gold paint to the birds on the walls, the door, the floor lip, metallic grey to the vents, pipes, emblems on the wall and silver to edging around the walls and arches.


I’ve been carrying on with the painting and shading today. The smaller skulls have been painted and shaded, the gold details have been shaded, all of the metallic pipes, vents, and emblems I have shaded with a black wash, the gold door I have shaded within its recesses and to finish for the day I have basecoated the books with different variations of brown.


Today’s work started the painting floor of the 1st floor, painting the panels of both sides with a light grey, I used a black wash over all the metal work and into the recesses of the walls and floor. I then used a brown wash on the two floors, the recesses of the outside of the door and in areas of the walls. Using Games Workshops Auric Armour Gold I went over the aquilla on the door, the 4 gold birds and the gold skulls.


I have edged and highlighted the walls, the grebbles on the wall, metal work and the ground floor.


I have edged all of the gold work, edged all of the books and then finished the books by adding a gold line over each of their backs


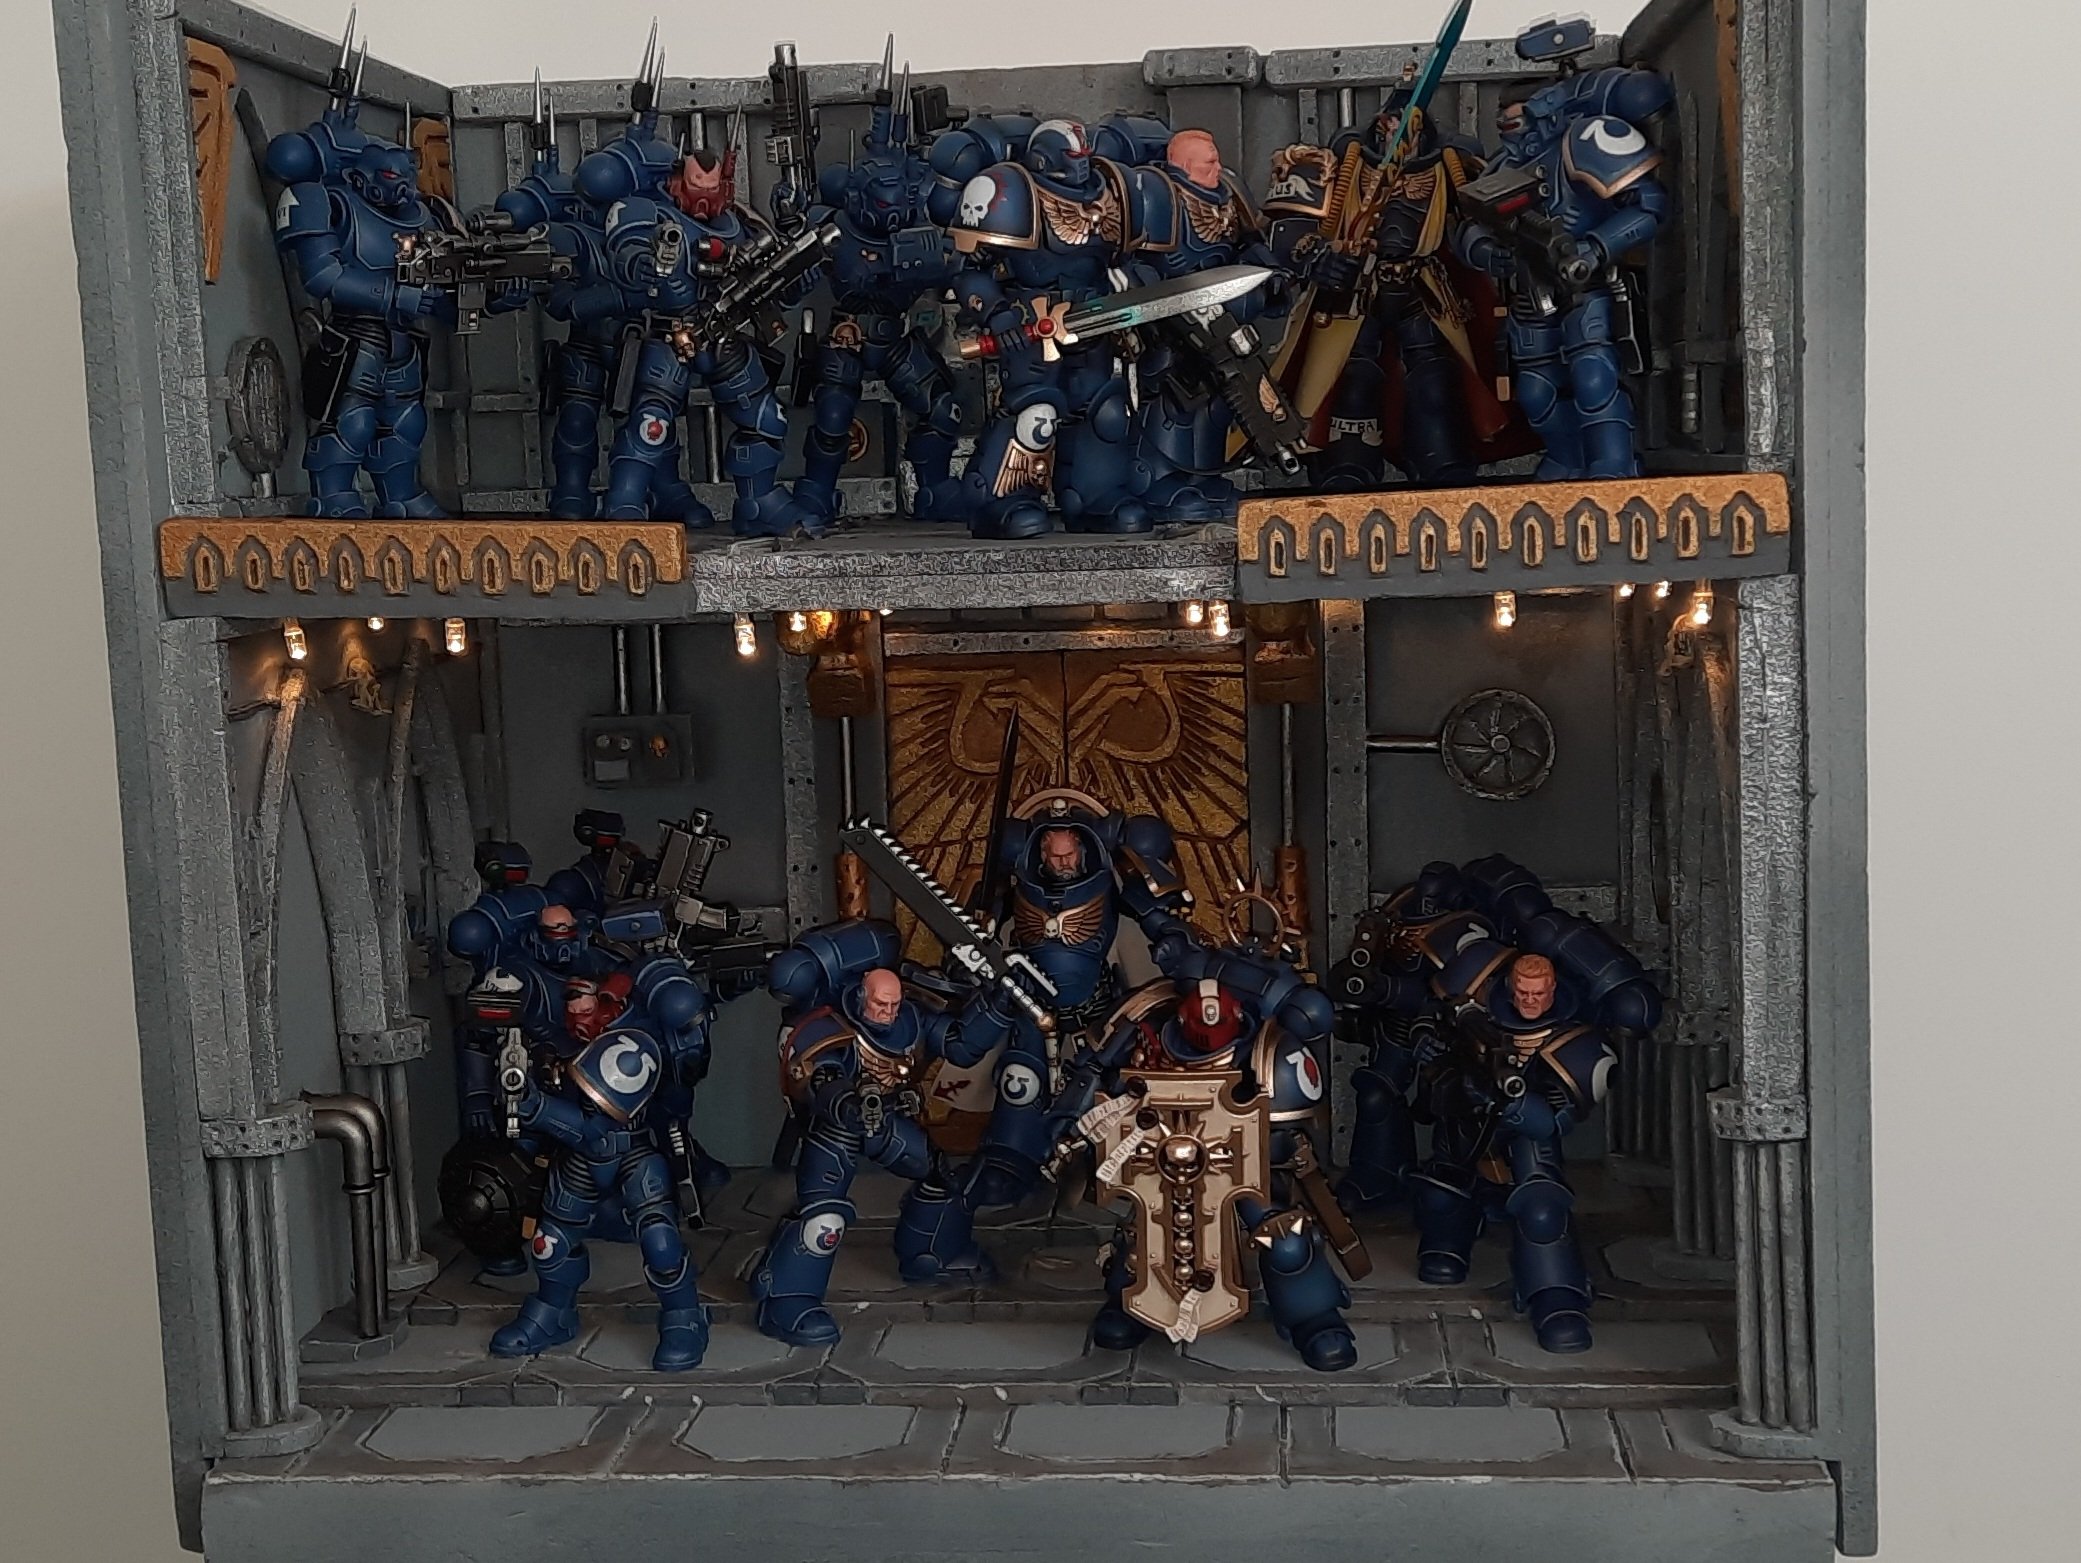
To complete this piece I found a string of LEDs to use to illuminate the ground floor. Once I got all the LEDs in place, I realised I had two left in the string of 20 which finished next to the computer console. This gave me an idea, I added a third pipe to the front of the console and second I created a hole within the centre round screen to the other side, I then used hot glue to cover the top of the pipe and the console and inserted the LEDs into them, thus giving the console some little internal light.


I might, later on, add some LEDs to the upper floor but for now, this marks the completion of this piece. I’ll get my usual finished pictures done and posted as soon as I can
The sons of Guilliman


