Aliens vs Predators Outpost
This latest diorama I have started, takes influence from Aliens and Predator genres, it is scaled for the Kenner Aliens vs Predator figures made in 1991, scaled for 3.75 to 5 inch. I’ve done a lot of buildings and alleyway’s recently and wanted to do something and a little out of this world!
To start, I have constructed the front of the outpost building using a combination of 10 mm insulation board and 5 mm foam board to build up the doorway and the front wall of the outpost.


While I was exhibiting at Bradford Unleashed February 2018, I carried on working in my AvP diorama. I cut out the base of the outpost, marked out a walkway around the front and right side.

Next I given the idea of sliding doors, I cut out a piece of foam boards and carved markings into the door. Using 5 mm foam board to add details to the reverse of the door.


With the doors made, it’s time to work on the inside wall. After cutting out the doorway, I’ve etched wall markings into the wall, adding a wall bracing. With these done, I can start adding extra accessories to the front wall before working on the side wall.


I carved in to floor 6 grill plates and then using the top of a bread knife ans pressed it into the foam board to make the slates in the grill plates.


Using 5 mm foam board for frame, 10 mm insulation board for depth. I used 5 mm board for the reverse wall, carving the wall slates to match the ones on the front wall.
Above the door I have added a cable run, moved the wall brace to the other side. Before I start fitting together, I will be adding a small wall on the opposite side to hide the join of the front wall.


I realised that up until now my Alien vs Predator diorama was missing a Predator, so let me rectify that with these test shots.


I created the third wall, using the same technique as I’ve used throughout this build, with the combination of 5 mm foam board and 10 mm insulation board.


I’ve started reworking and sanding each of the walls, the left wall I added a layer of thin bolsa wood over the foam board frame.
I also started to work on the cable run cage that runs over the middle and right walls.


Deciding this needed a roof for Aliens to drop down and pull marines up to their doom.


I cut a piece of foam to the size of the diorama, then evenly spaced squares were cut out, the frame edges sanded. To make it look like it’s a complete roof from the outside, I added a second layer on top of the frame, then two corners. The roof was sanded and glued together.


With the roof complete I started applying paint. I’ve reached the point where I need to paint each section individually before I can start gluing it all together. The first layer on the floor, doors and three walls with a combination of a dark and medium grey.


With the undercoat dryer, time to start painting the outside. Using a grey acrylic spray to coat the side walls I also applied a layer to front but unfortunately I hadn’t put treated the archway enough and the grey paint started to dissolve some of the foam.


The rostrum on either side has been painted silver, the archway and doors have been given a coat of gun metal grey. The slays on the side walls was given a coat of dark grey.


The inside left wall I have started highlighting it features with a light grey on the wall, the bolsa wood a coat of gun metal grey.


I applied some little paint tweaks to my diorama, the floor got a wash of gun metal grey followed by an aluminium wash to make it look more metallic. I mixed up a blue/grey for the roof and applied its first coat, I will darken the exterior border of the roof before weathering the exterior of the outpost.


After I finished with the roof I was looking at the inside and was not happy with how dark I had made it. I still had some of blue/grey left over and went over the squares on the front and right walls.


My double diamonds tread plastic card arrived, I cut into shape I needed to fit the walkway around the bunker, it was then sprayed grey.


While this is drying I went back to the roof, mixed up a medium grey and painted the top of the roof, then mixed some blue and repainted cross section of the roof.

I turned to the bunker, started to weather the outside walls before doing the same internally. Adding the Weyland Corp logo above the door, along with some little painting touches.


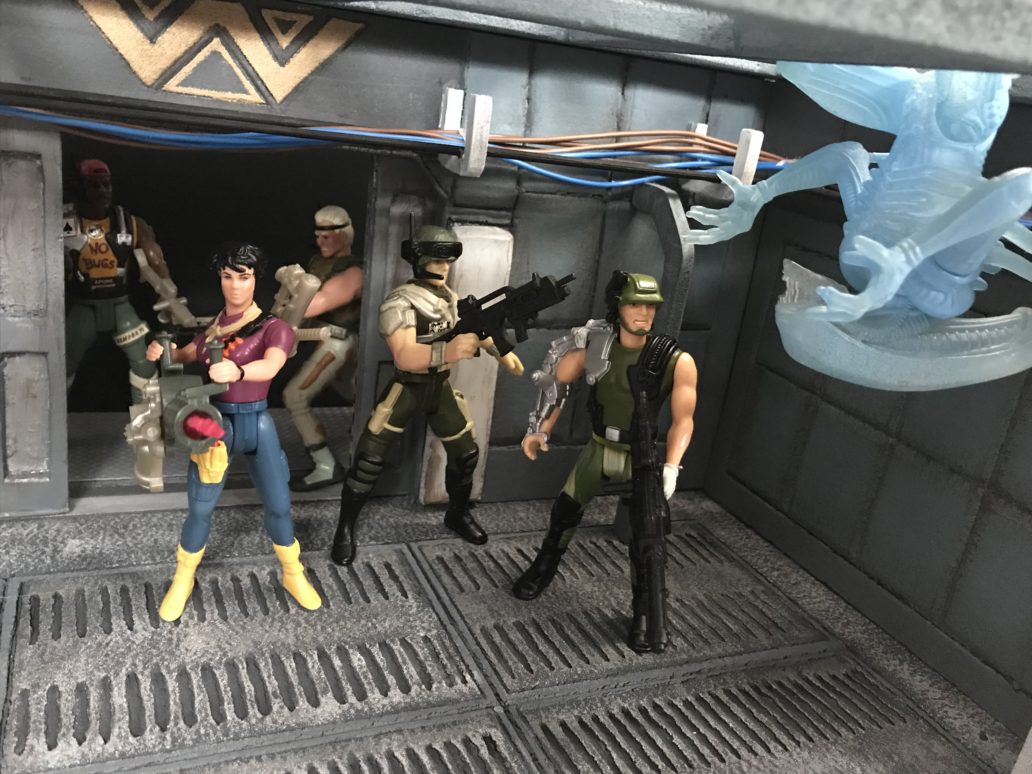
Painting is now completed, all pieces glued together.


Final pictures completed.


