Abydos Stargate
I recently acquired the 1994 Hasbro Stargate figures based on the film which gave me inspiration for my latest diorama. I wanted to build the scene where O’Neil and his team first walk through the Stargate and end up on Abydos. I would create the stone steps, back wall and a pair of pillars at the base of the step but first I would need to either make or purchase a Stargate as centre piece for the diorama.

I found a seller on eBay who sells 3D prints of a Stargate for a descent price, if you would like one I can point you in their direction. I gave the Stargate a white base coat, then a black spray coat. This was necessary to to get into all the nooks within the 3D print. I applied two coats of gun metal grey over the entire ring, yellow for the lights and then dry brushed black over the complete Stargate.

To build the altar which the Stargate is situated on, I will be using 10 mm foam board. I have cut 6 pieces to see how it would look, to go either side of the Stargate with a couple of smaller cuts for the steps leading to the gate.


The front three pieces I cut them down to 2.5 inch in depth and glued them together, the three rear pieces were cut down t 2 inch in depth. I then cut out six 7 inch by 2 inch, these were used as side pieces of the altar, sandwiching the now two pieces and the Stargate in between them. The four sections were sanded and then glued together. Using 5 mm foam board cut into strips on decreasing thickness, these were used as the steps leading up to the Stargate.


A single piece of 5 mm foam board was cut into encompass bottom of the glued sections with a small section at the front jutting out to act as the bottom step. Using hot glue, the base and the stairs were fitted into place and the whole altar was sanded down. Next I carved stone slabs into the surface of the altar adding cracks to slabs and on the front, either side of the stairs. A couple of ‘L’ shaped pieces of foam were cut and placed either side of the gap where the Stargate is going to act as braces for the Stargate ring.


With altar built a base coat of made up of grey and burnt umber which was spread over the entire altar. To lighten the altar, I made up a medium grey mixed with blue and using my airbrush, sprayed an even coat over the altar and then a light grey/blue mix was then sprayed evenly over. Once dry I went over all cracks and gaps between the slabs with a medium grey/blue.


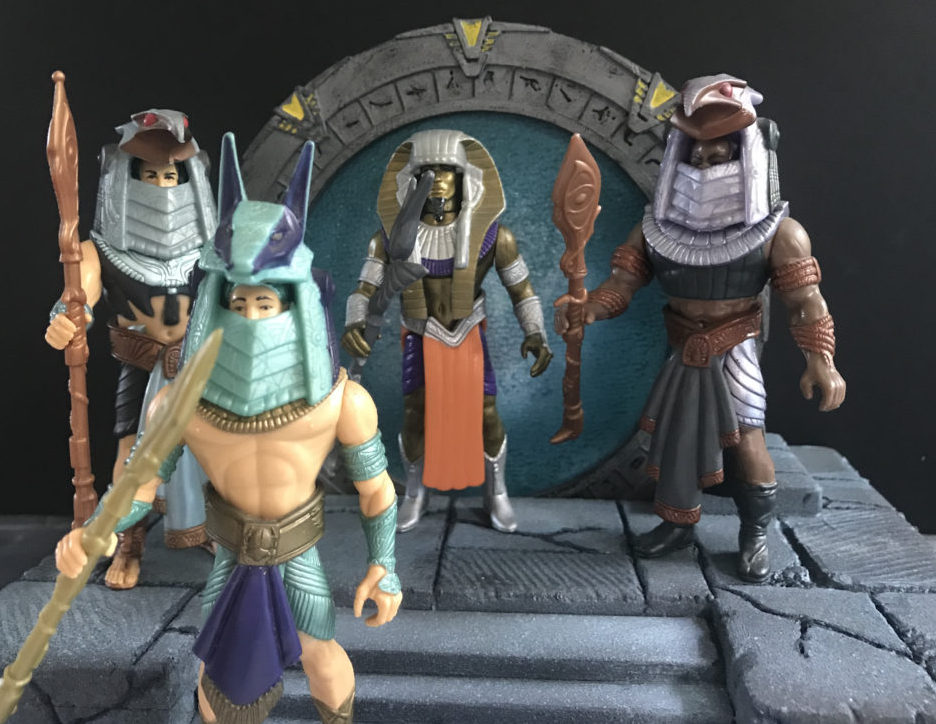
With the alter complete I can now start to concentrate on the walls surrounding the altar, in the mean time a couple of pictures of the complete altar next to Diamond Selects 7″ O’Neil and Teal’C figures. Yes this diorama was not made them lol.


I purchased a sheet of calm water from www.greenstuffworld.com, cut it to the size of my Stargate. Using my airbrush I sprayed a base layer of blue/green then worked in a lighter blue/green and white for the center.


Up against a dark background I was slightly taken back with how the Wormhole effect had come out.


